
Configuring and licensing the solution after installation
This document will focus on the procedure of installing the immediate solution after installing the OS image.
First step
Licensing
As part of licensing the solution, you will need to generate an encrypted file for the current server using the collect-host-info <host-name> command as a root user. <host-name> was specified during the OS installation.
After that, the generated file should be sent to the company to receive a host.lic license file in response.
The obtained license file should be placed in the path /etc/skyspace/host.lic
Second stage
First Server Mode
To start the installer it is necessary to run the sky-start installation script from root user.
After it starts the UI will open, the steps of which are described below.
Step name | Field description | Screenshot |
|---|---|---|
Selecting the installation mode | To install the primary node, select the first item Install first node of cluster. For the secondary node, select the second item. Last item to exit. |  Selecting installation mode: first or second and then server |
Nextop Root User configuration |
| 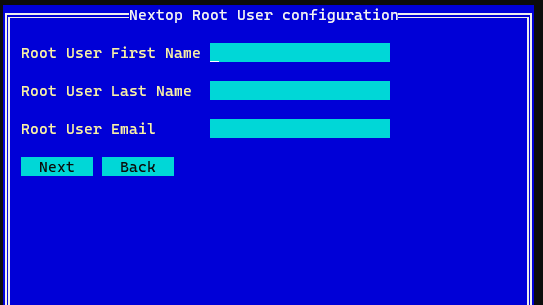 Creating the primary Root user of the solution |
SMTP Configuration | Fields for configuring SMTP for sending emails. It is important that a test email is received upon completion of the configuration, which is required to be confirmed, because the email client is used to deliver the profile for logging into the application. | 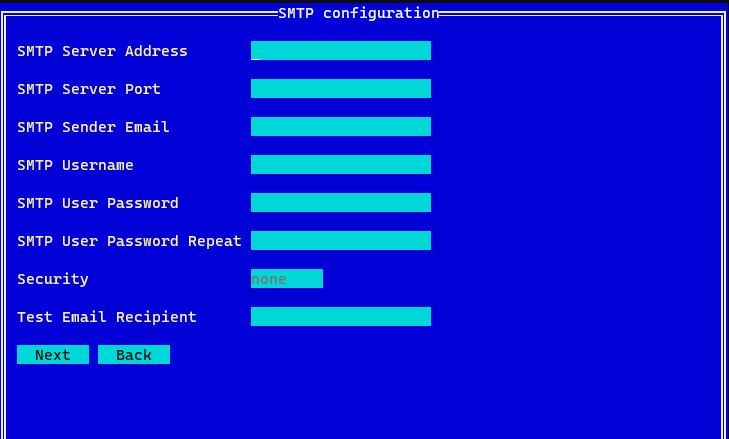 SMTP parameters 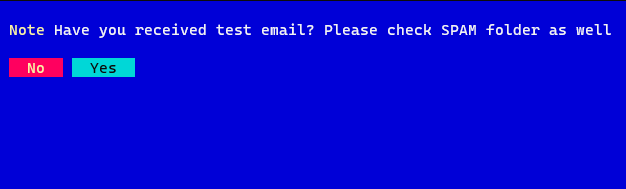 Confirming receipt of a message on the test E-Mail |
Internal Server Network | First the primary Management Interface is selected, which will be the key interface for the primary communication of the product with the surrounding network. In addition to the primary interface, Teaming configuration is immediately available with the specification of redundant interfaces. All specified Management interfaces will be automatically inserted into the Virtual Switch. Then VLAN configuration is available, specifying MTU. Next is IP configuration with DNS, in particular IP and mask of the current host, as well as adding Range IP addresses for adding future hosts already in the UI of the product. Warning Configure IP Ranges for future hosts already at this step. In early versions, changing these ranges later will not be possible. | 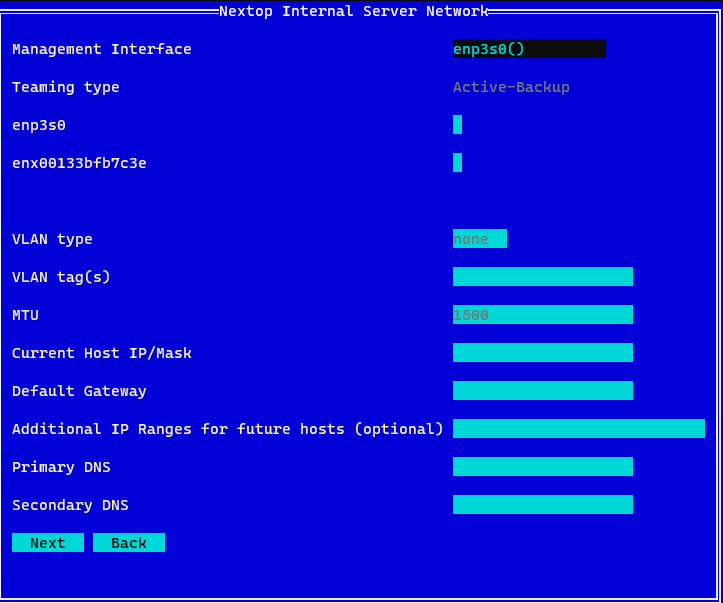 Configuring the network environment of the primary Management Port of the added server |
Central Server Virtual Machine (CSVM) Networking | Select the network environment settings for the central server virtual machine that manages the system components. It is possible to select the option to use the same settings - then the settings of the previous item will be applied and you will only need to specify the IP address for a specific current VM, as well as the single address of the central server VM. You can also configure the network environment for the Central Server VM separately. In this case, the settings are identical to the previous item. | 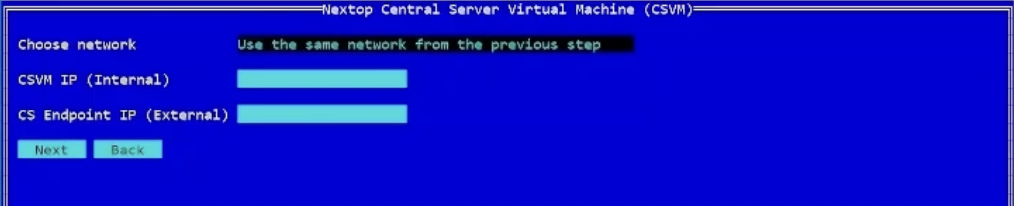 Configuring the CSVM address or a dedicated subnet with a dedicated adapter |
Path for storing the image of the Central Server VM. You can specify a directory that does not exist, in which case it will be created recursively. |  Setting the storage path of the CSVM image | |
License Password Configuration | Specifies the license password. It will be used to add new servers to the system. Warning! Be sure to save this password in a safe place. It is required to activate all further hosts. |  Setting the licensing password |
Summary | A window that displays all entered data for verification. At this step you can go back for corrections, or click continue and start customizing the solution. | 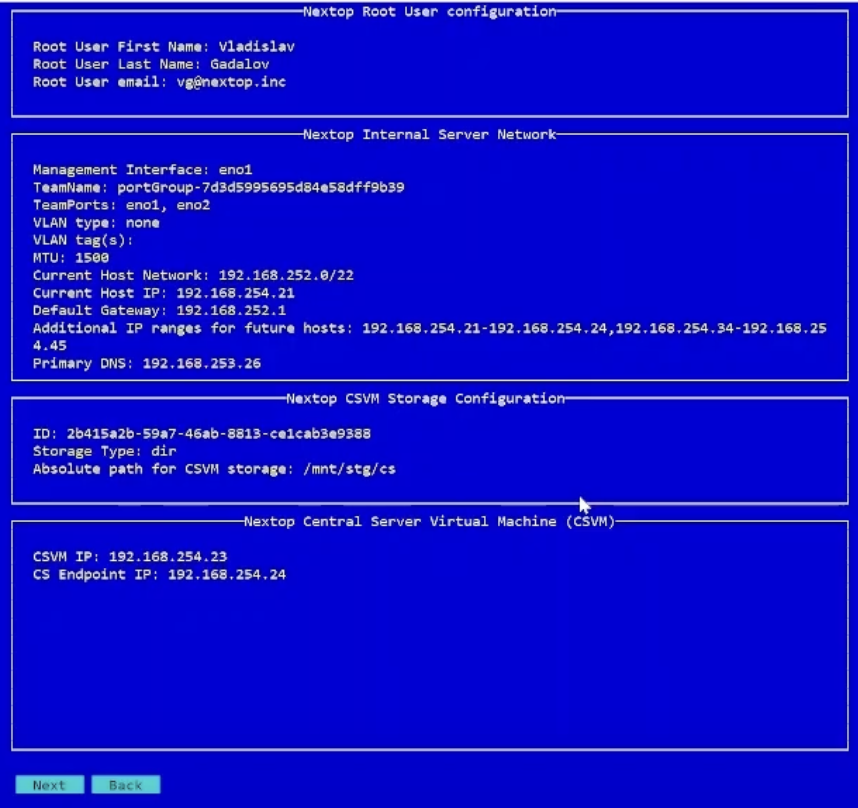 Checking all entered parameters |
Second Server Mode
For this mode, the appropriate installation mode must be selected at the beginning of the installation:
Step Name | Field description | Screenshot |
|---|---|---|
Selecting the installation mode | To install the primary node you need to select the first item Install first node of cluster. For the secondary node, select the second item. The last item to exit. | 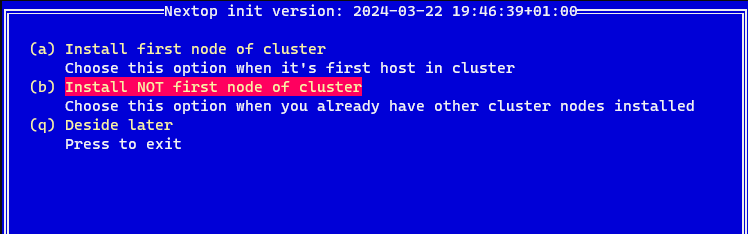 Selecting the installation mode: first or second and further server |
Central server IP | At this step you should specify the virtual IP address of the central server. | 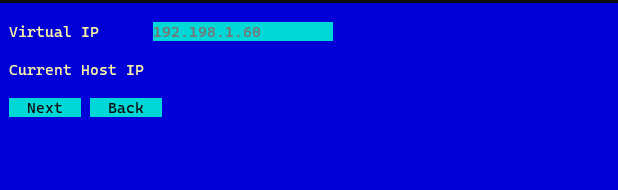 Entering the IP address of the Central Solution Server |
SMTP Configuration | Fields for configuring the SMTP client for sending e-mails. It is important that a test email is received upon completion of the configuration, which is required to be confirmed, since the email client is used to deliver the application login profile. | SMTP parameters Confirming receipt of e-mail to the test e-mail |