
Virtual Machines Administration Guide
The virtualization service is entirely dedicated to the management and monitoring of virtual machines (VMs), their virtual disks, as well as managing the network environment of virtual machines.
All control elements and resources are available in the "Virtual Machines" section of the navigation menu.
The main screen is a tabular view listing all the virtual machines created in the system.
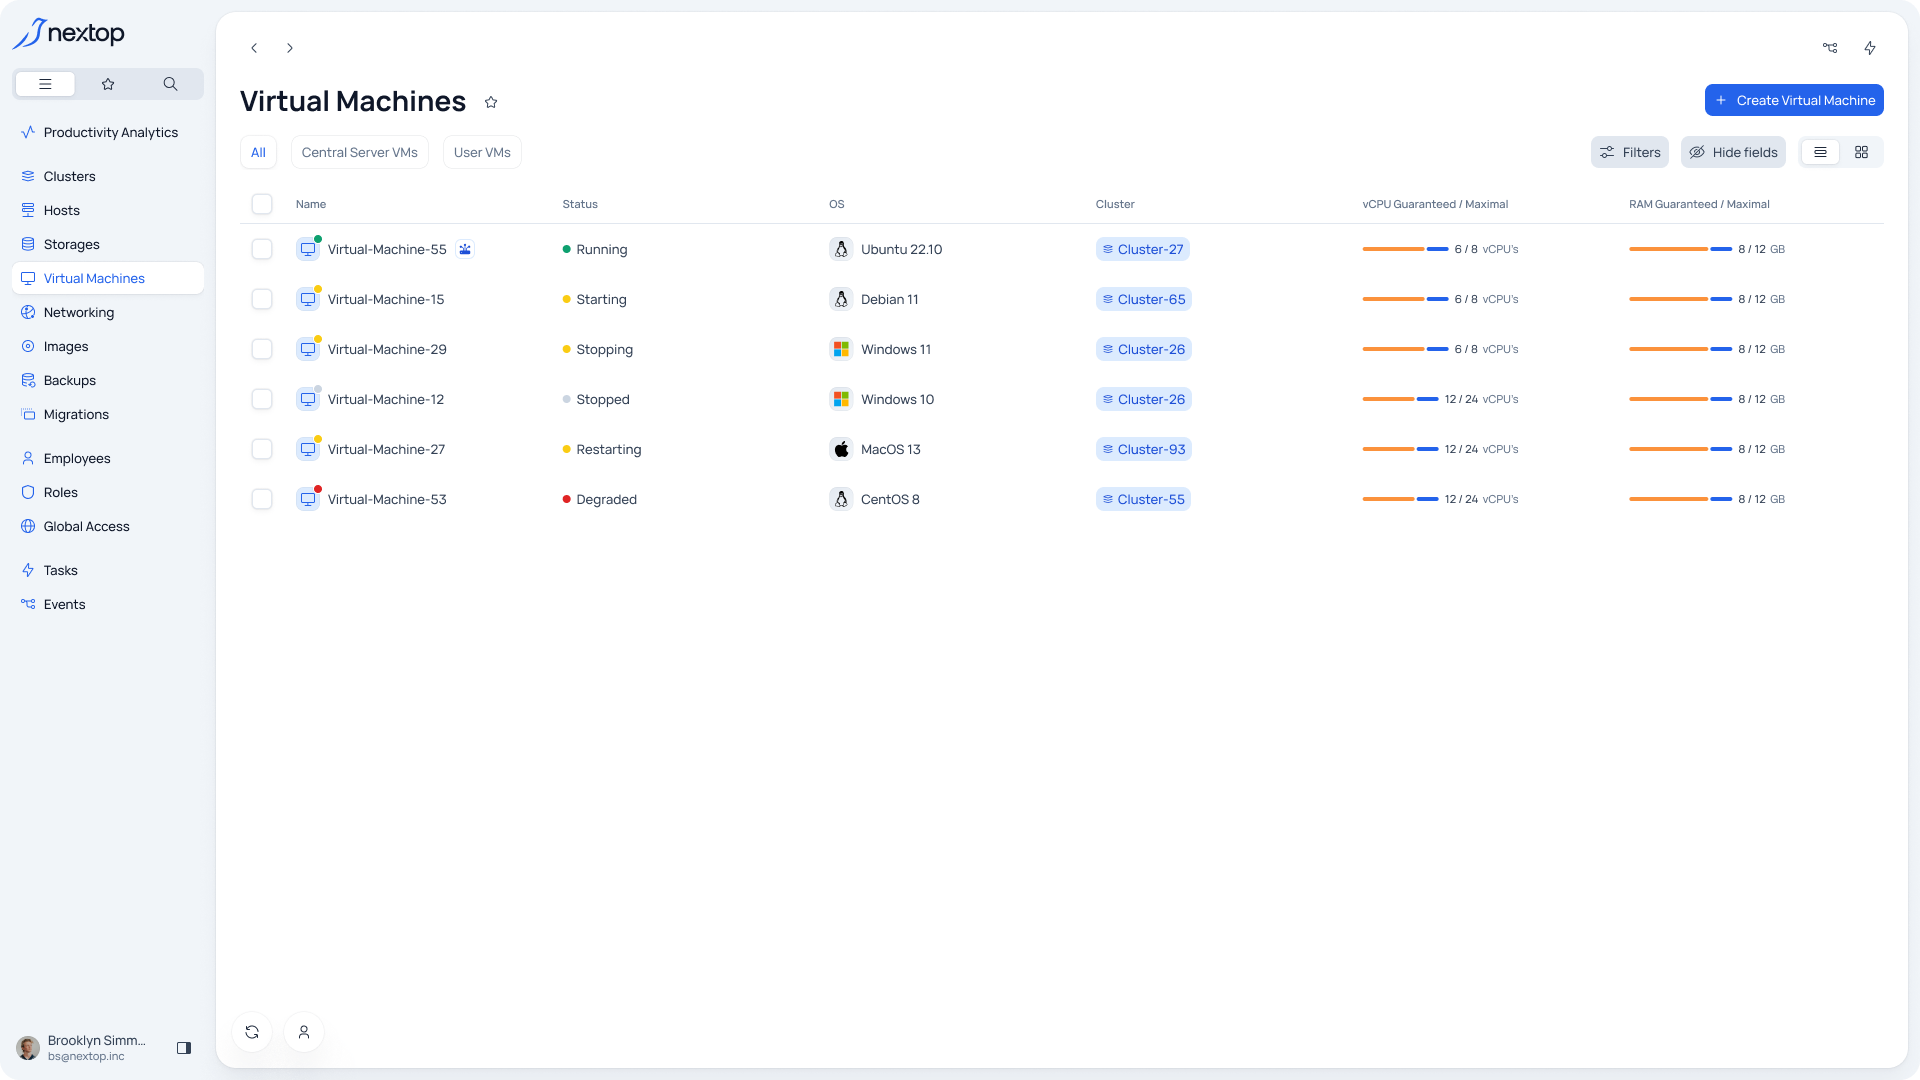
Entity statuses
Status name | Explanation |
|---|---|
Stopped | The VM is in a healthy and turned off condition. |
Running | The VM is turned on and is in a healthy condition. |
Degraded | The VM host is in a Degraded status. |
Starting | The VM is in the process of starting. This status is assigned in the interval between receiving the task to start and the actual start of the VM. |
Stopping | The VM is in the process of shutting down. This status is assigned in the interval between receiving the task for a forced shutdown and the actual shutdown of the VM |
Creation
To add a new virtual machine, you need to select the “Create Virtual Machine” button. And then follow the steps:
General - here you need to set a name for the VM and a note if necessary, as well as the owner of the virtual machine.
Configuration
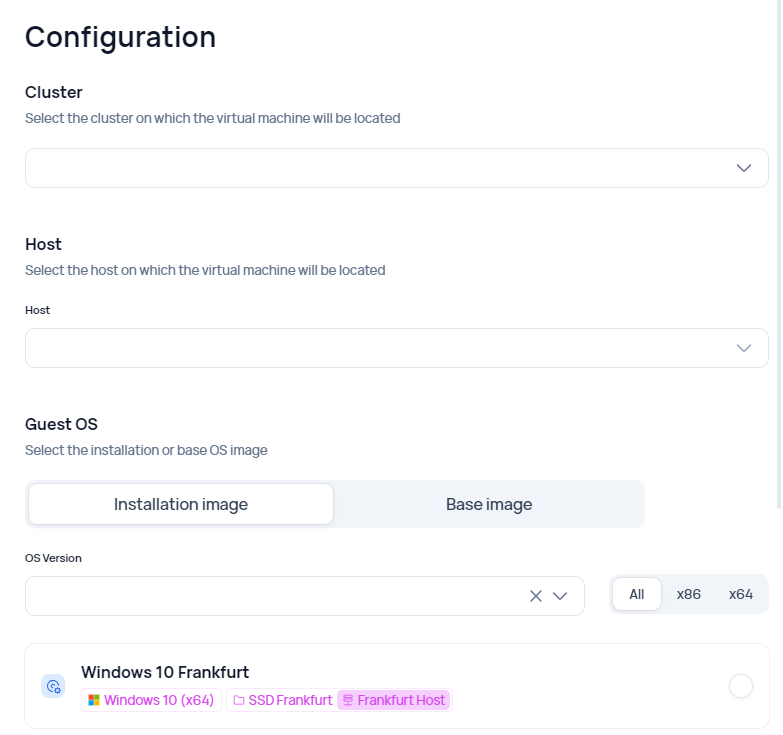
Cluster - you need to select the cluster in which the VM will be created.
Host - You can choose a specific server to assign the VM to, but by default, the "Use load balancer" option is selected so that the load balancing system automatically assigns a server for the selected resources of the virtual machine.
Guest OS - a section for selecting an image. Filtering is available by OS, image type, and architecture.
Virtual Hardware - setting the characteristics of the VM being created:
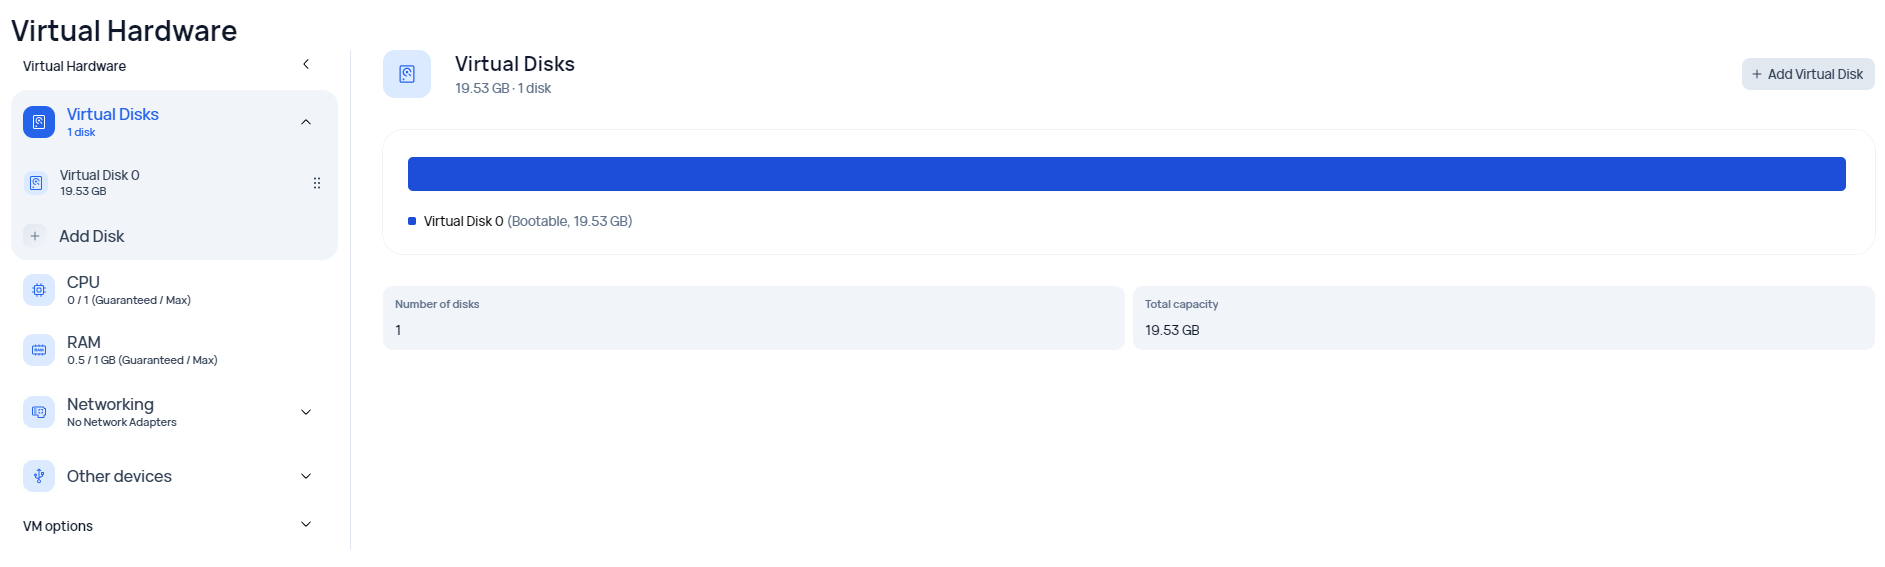
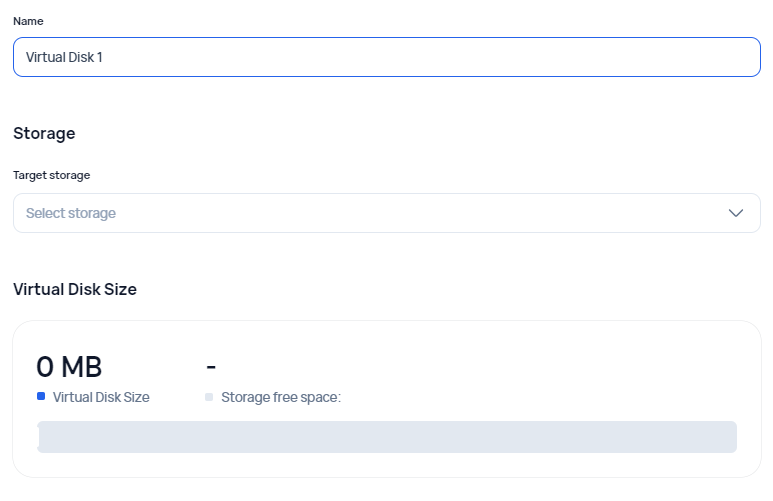
Virtual disks, where you set the name, size, and storage location of the virtual machine's disk image. Note that choosing local storage as the storage location will "bind" the virtual machine to a specific server.
CPU - guaranteed and maximum vCPUs allocated to the virtual machine
RAM - guaranteed and maximum RAM allocated to the virtual machine
Networking - a network adapter is created for the virtual machine, where a static IP address can be set.
Other devices - the number of USB ports allocated for the virtual machine, where 0 will prohibit USB connection to the virtual machine
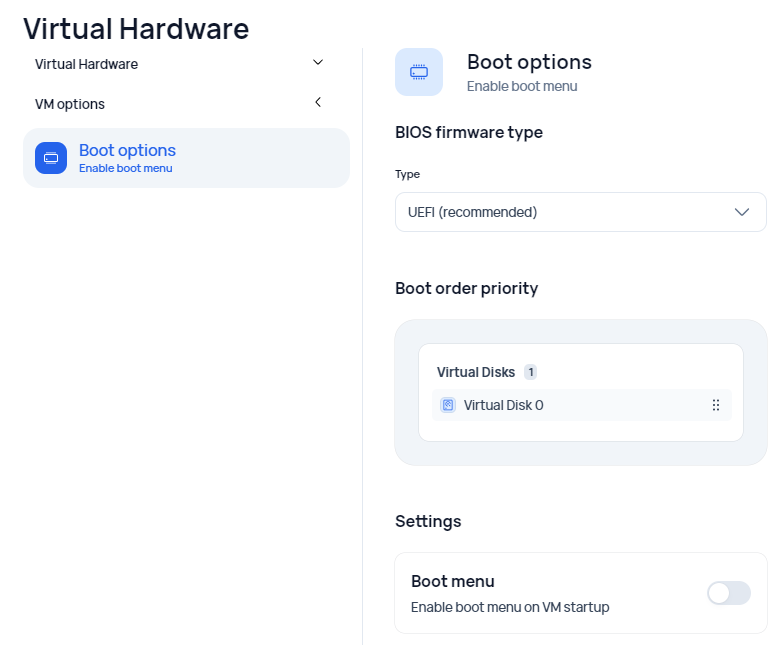
VM options - contains information about the virtual machine's boot options.
Summary – Completing all of the above-listed points is essential for the summary.
When specifying CPU and RAM for a virtual machine, a balancer is constantly working, which can limit the maximum values set within the available resources of the selected cluster or server.
For more details Nextop Load Balancer
Editing
To modify a VM, hover over the required element in the table and select the edit icon.
Deletion
To delete a VM, hover over the required element in the table, expand the additional menu, and select "Delete".
To delete, the virtual machine must be in the Stopped status.
Common resource sections
The following items are available for each VM
Summary
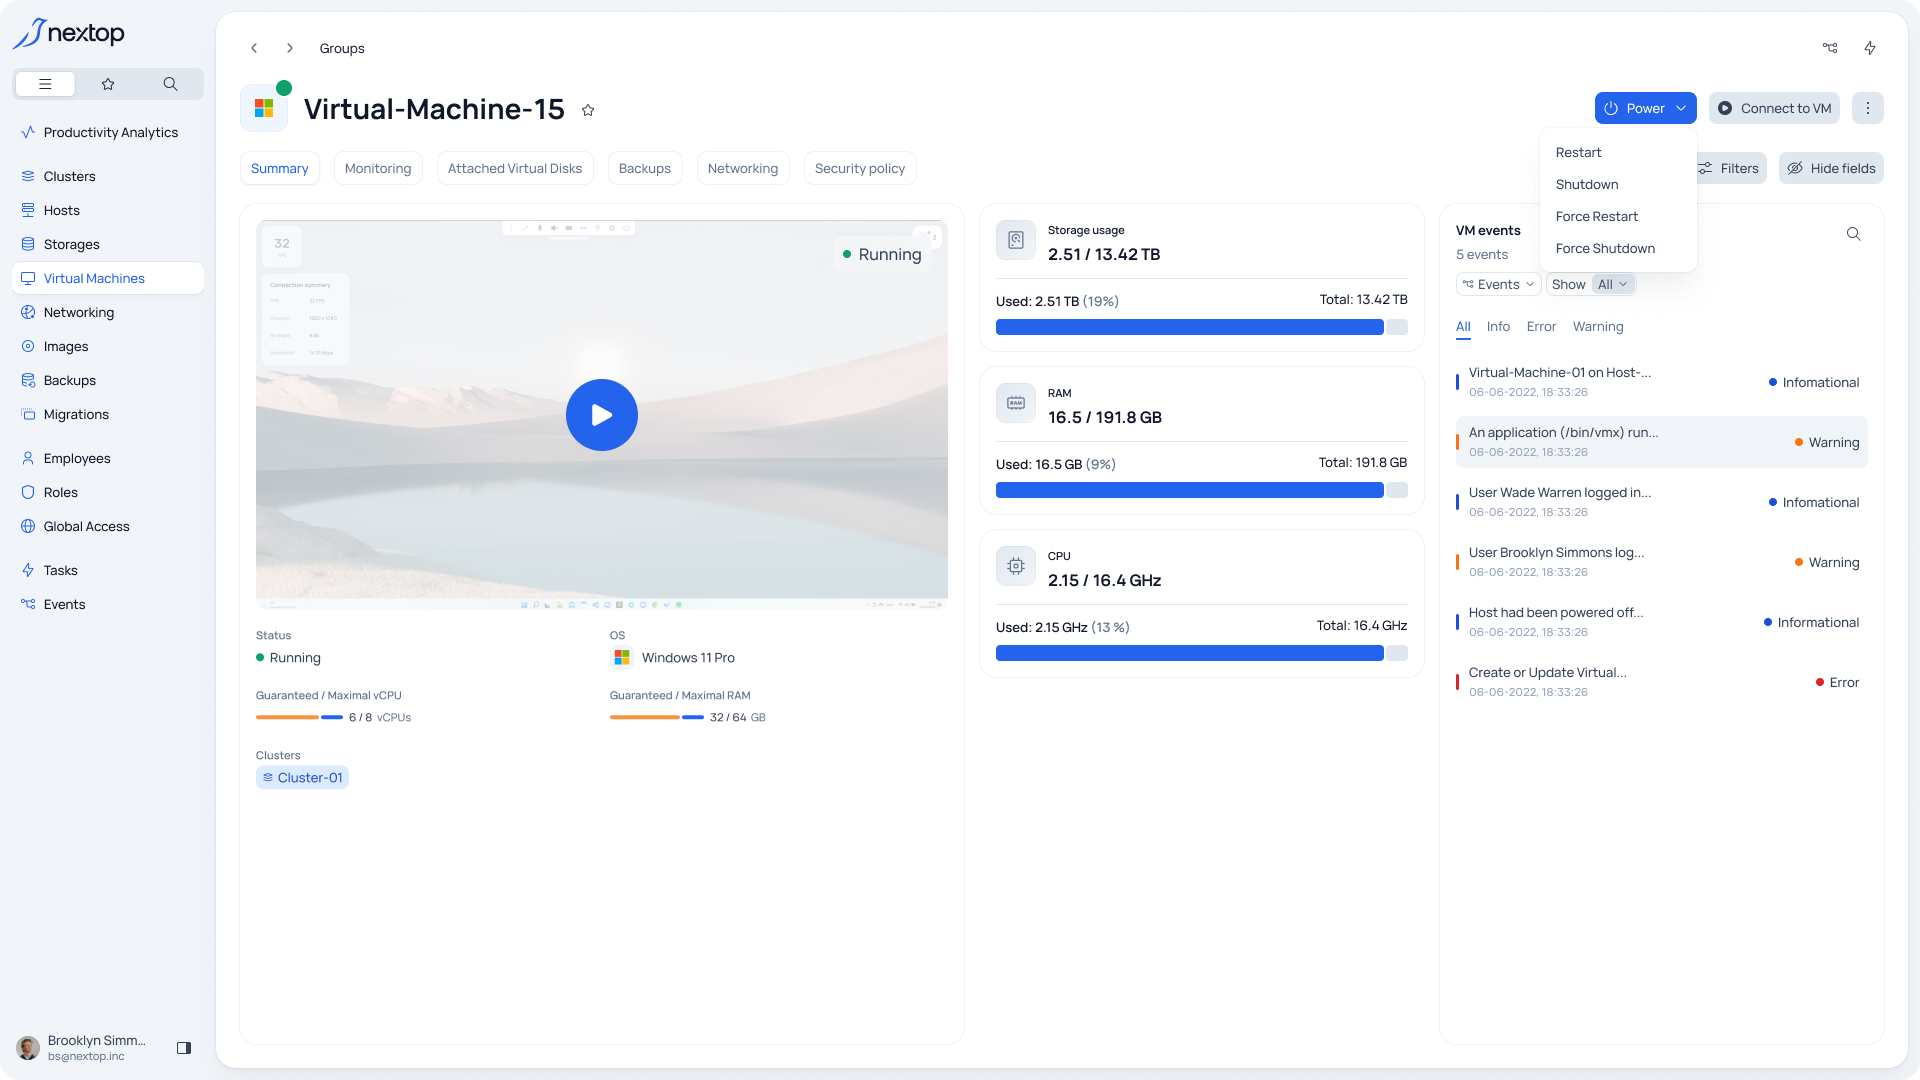
It consists of three main blocks:
General - lists the main data about the VM and the resources used. From this block, you can launch a separate interface for connecting and working in the selected VM if it is running, or start it.
Block with metrics on VM resources
Block with tasks and events, where the selected VM is indicated as the "Target"
Also, in this and subsequent items, VM power management is available:
For a turned-off machine, the "Start VM" button is available, which starts the VM.
For a turned-on VM, there is a "Power" dropdown list, inside which you can perform soft and hard reboots and shutdown of the VM. Also, for a turned-on VM, in addition to the general block, the connection can be started with the "Connect to VM" button.
Monitoring
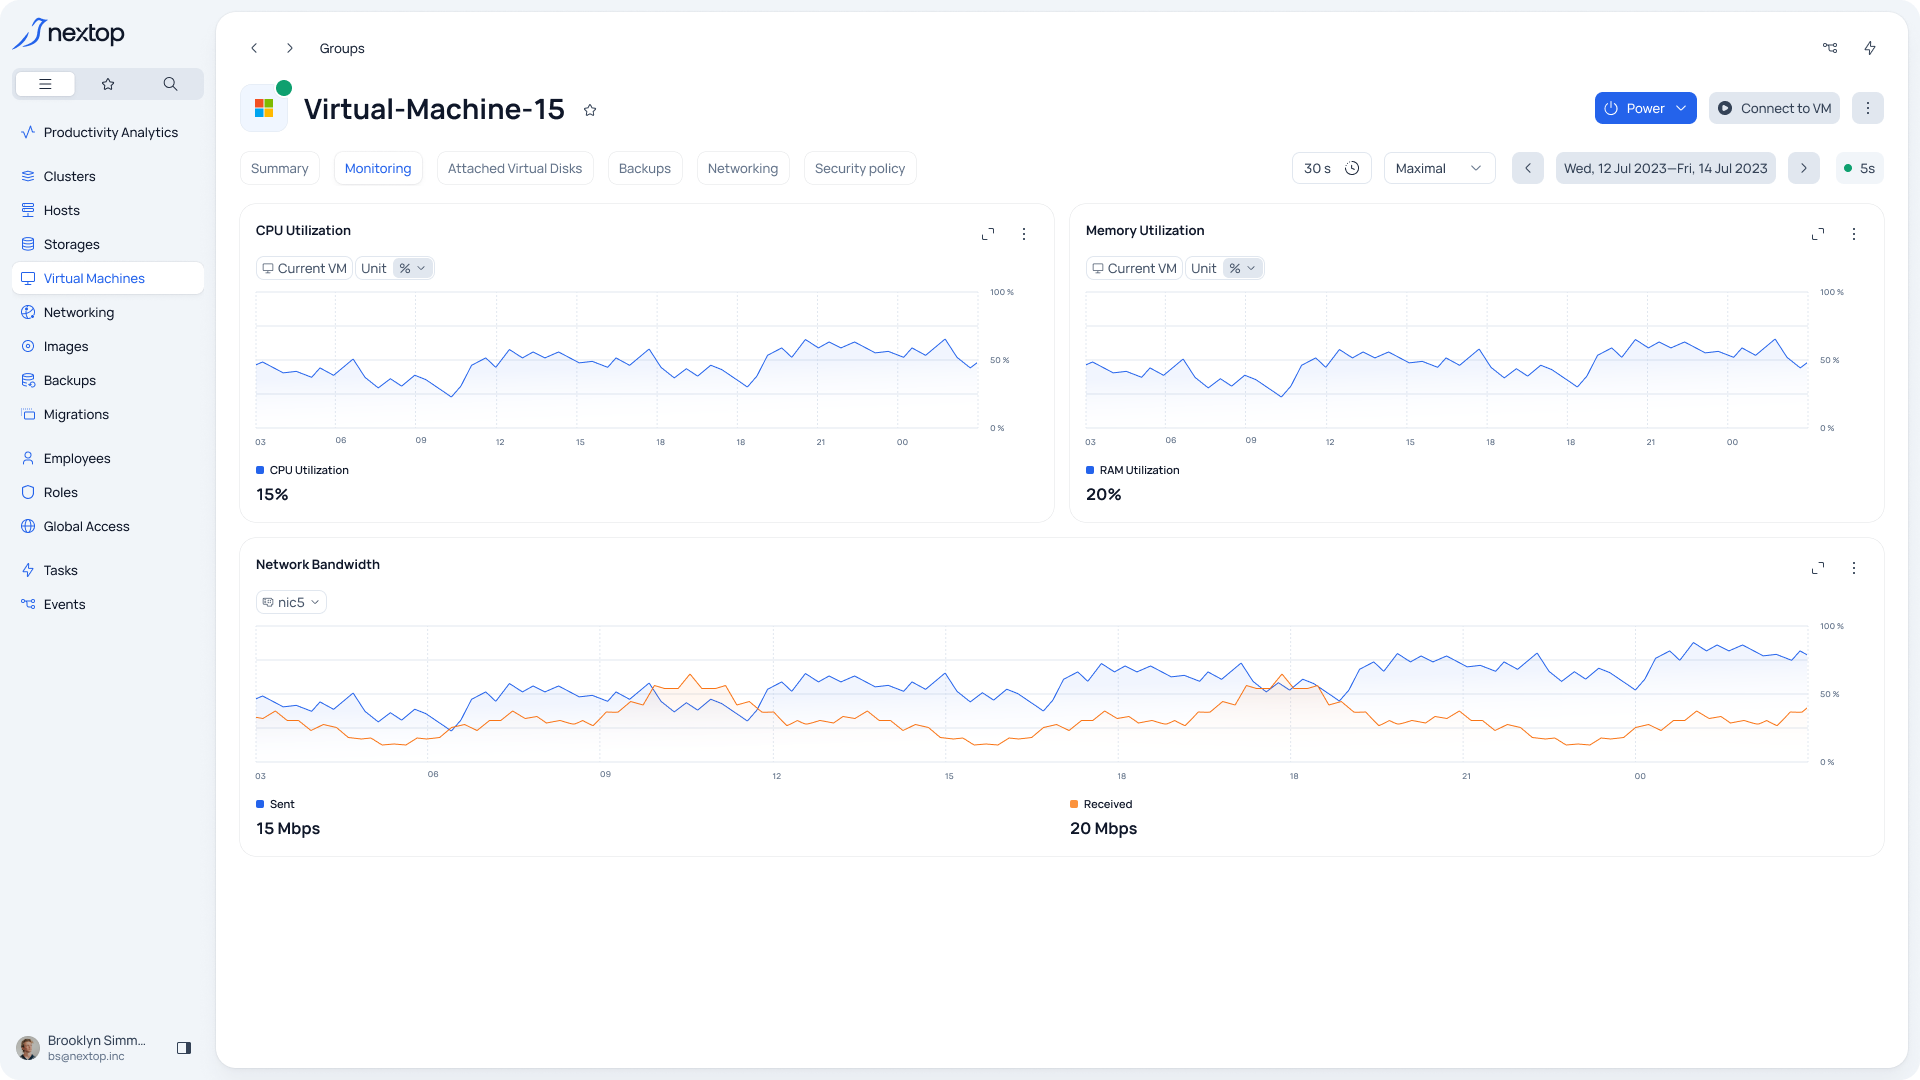
The section with a graphical representation of metrics for the cluster. For more details about monitoring management tools, you can read further in the provided documentation or resource Resources Monitoring Tutorial
Attached Virtual Disks
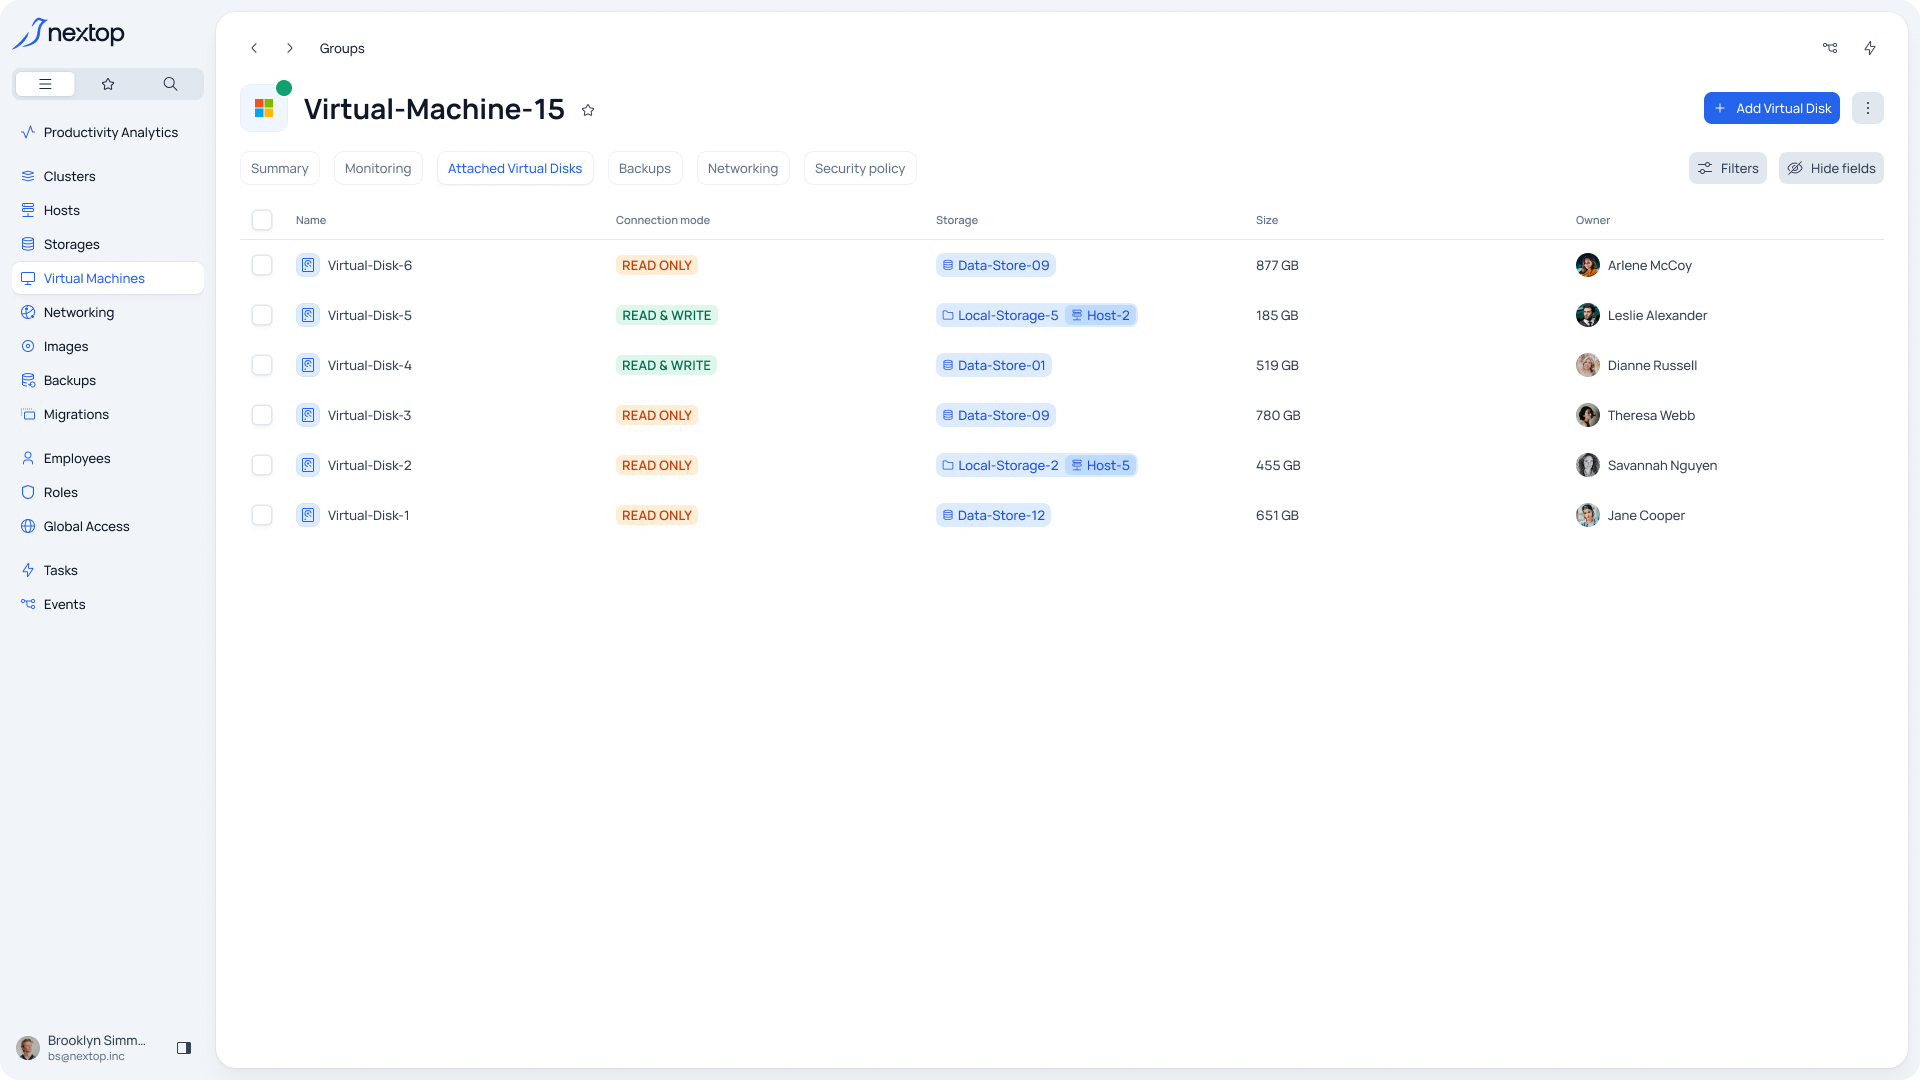
The table view of all images connected to the VM. For more details, please refer to the provided documentation link. Virtual Images Administration Guide
To connect a new virtual disk to the VM, you need to select the "Add Virtual Disk" button. This is not the only way to connect - essentially, the button is a shortcut for quick access to the necessary VM parameter editing section.
Networking
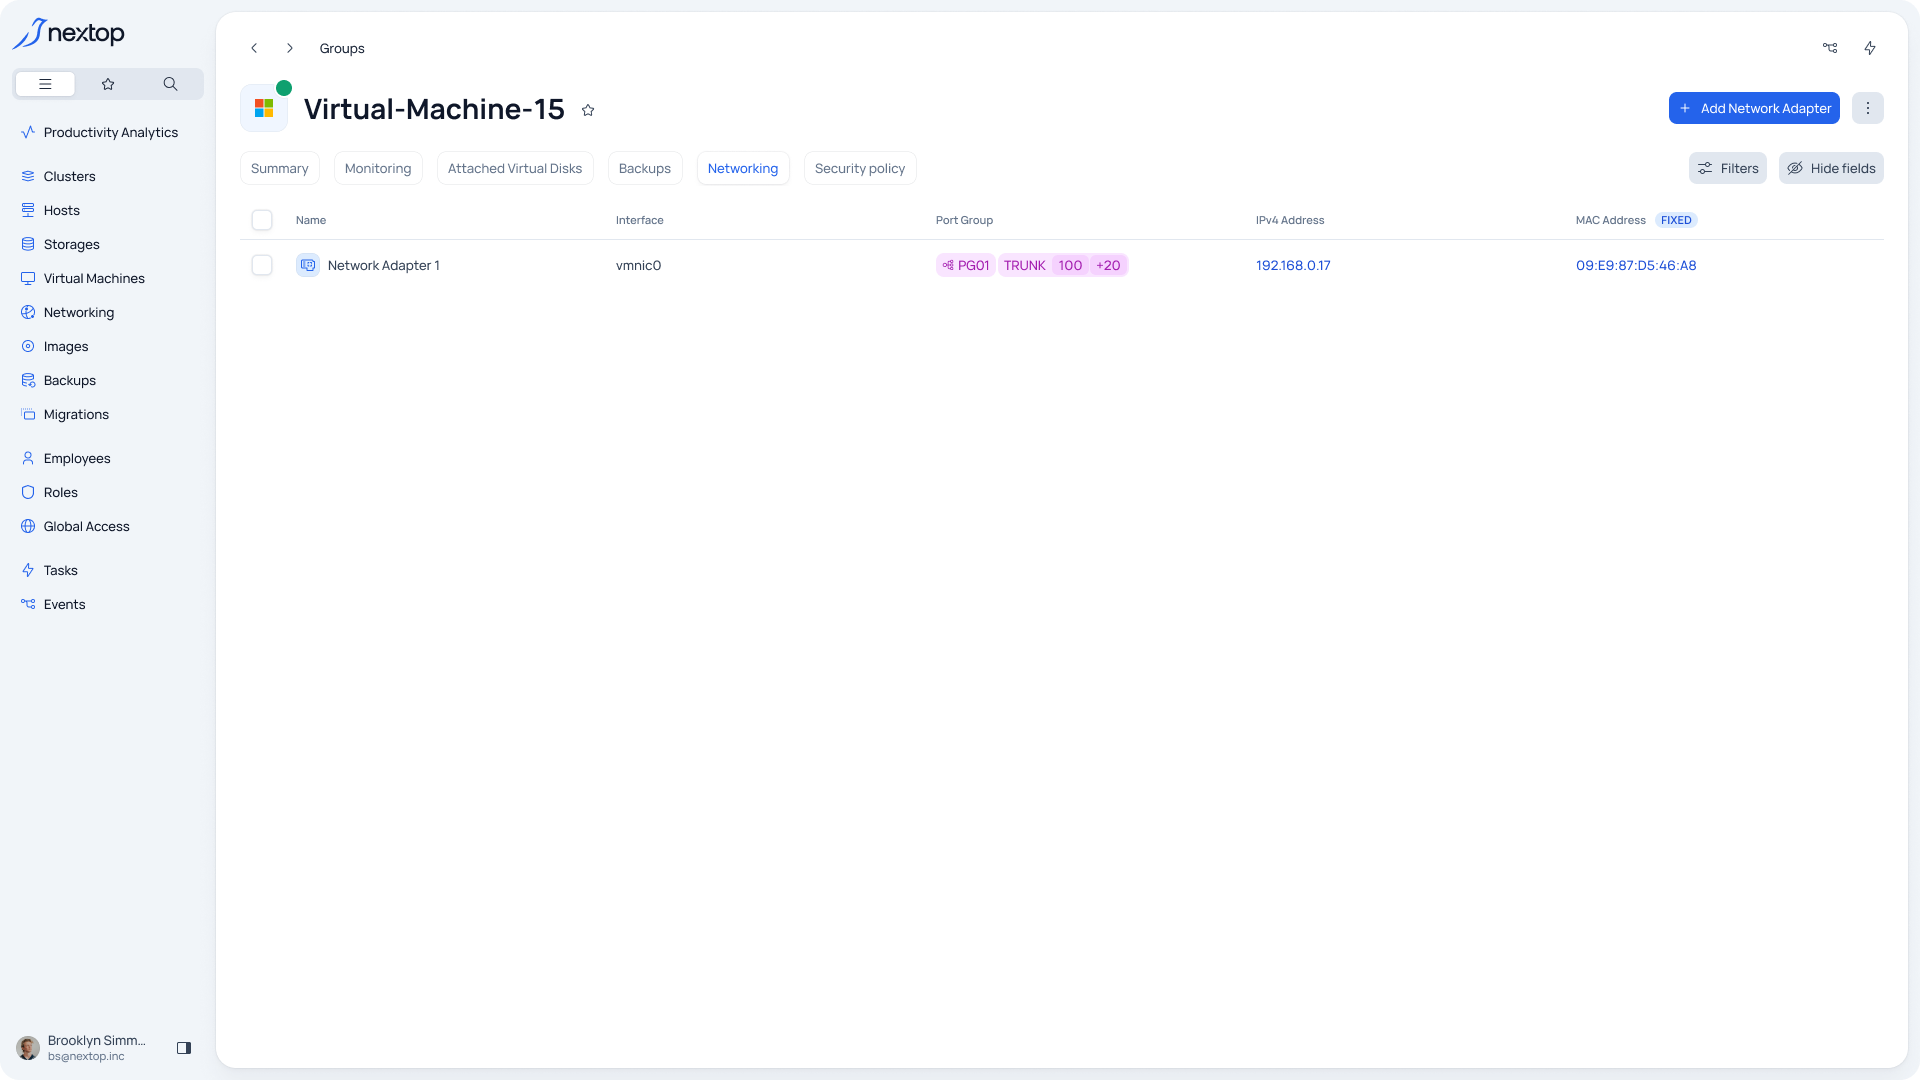
A tabular view of all network adapters created for the VM.
Security policy
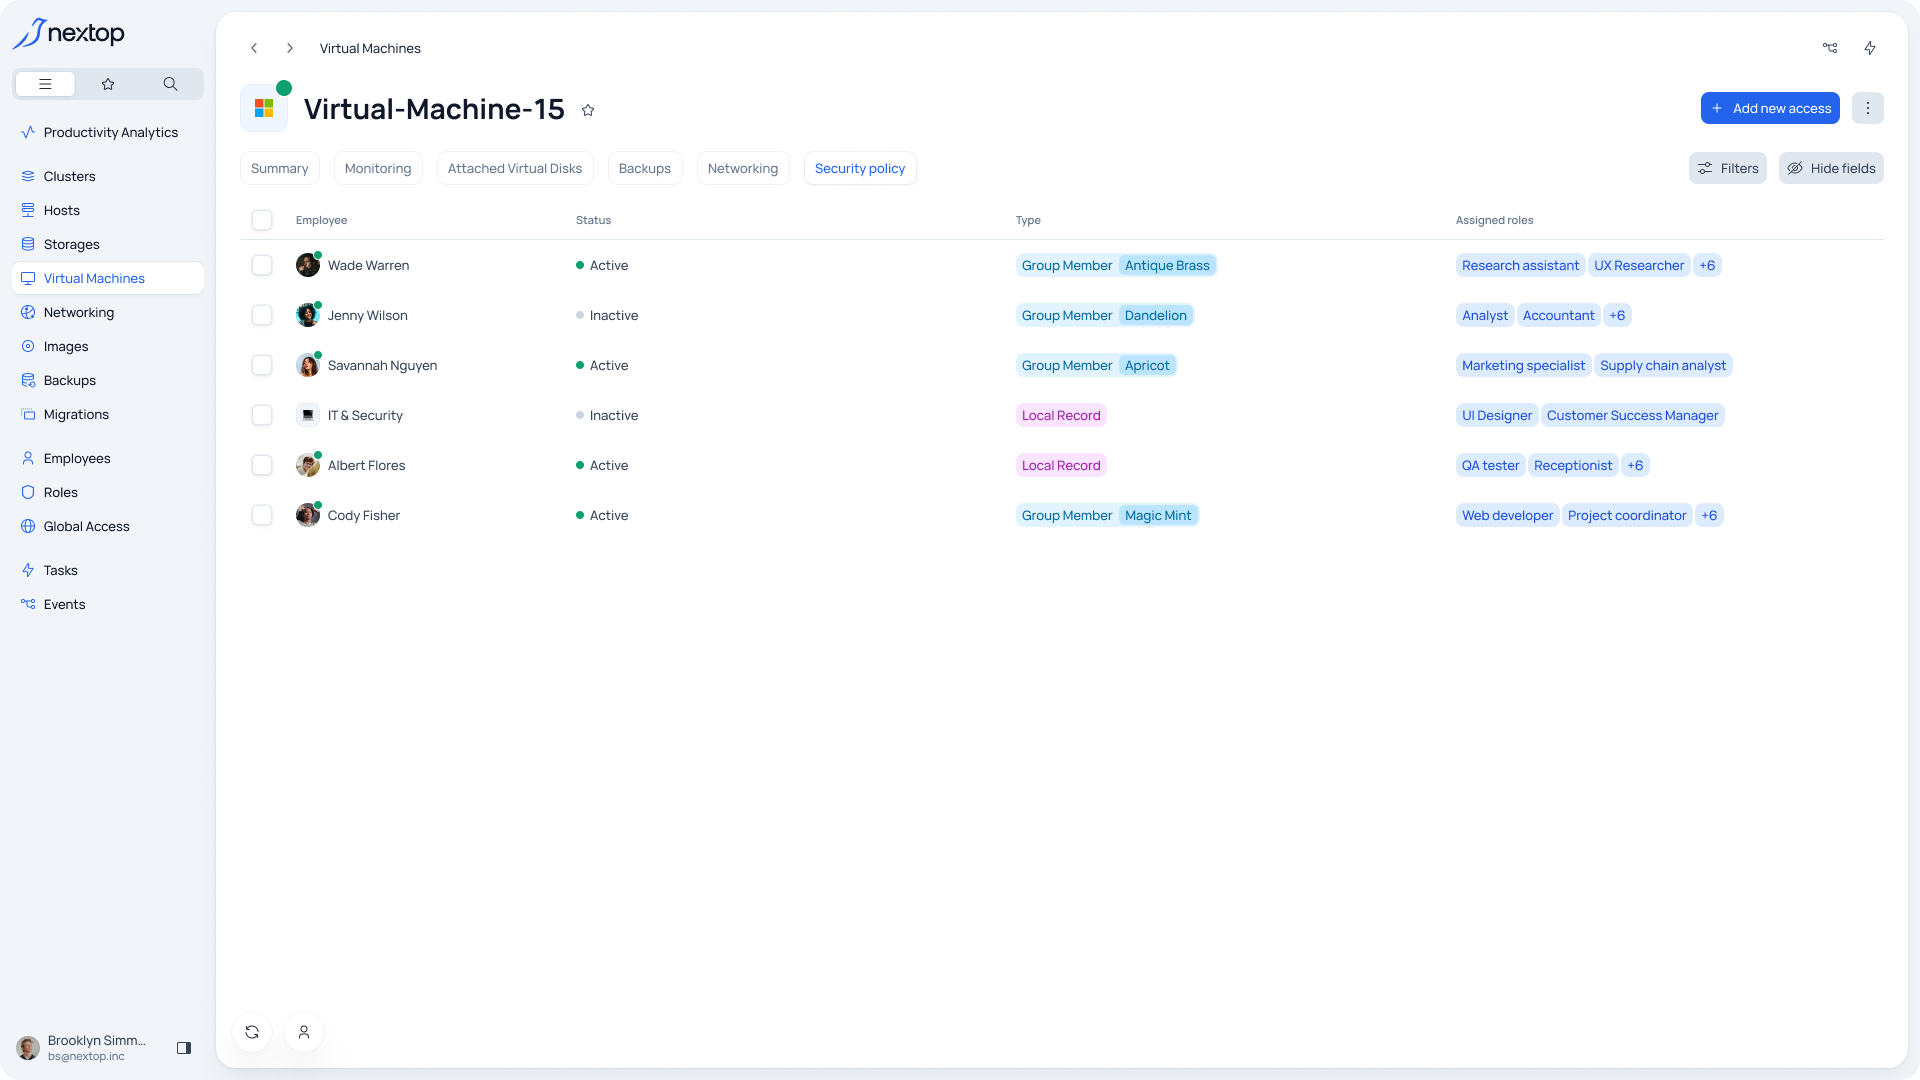
A table view listing the roles and the users to whom these roles have been assigned.
To add a new user, you need to select the "Provide access" button. Then choose the user/group and set of rights. You can read more at the provided documentation link. Global access to system resources
To change rights, hover over the required element in the table and select the edit icon.
To delete rights, hover over the required element in the table, expand the additional menu, and select "Delete".