
Networking Administration Guide
All control elements and resources are available in the “Networking” section of the navigation menu.
Virtual distributed switch
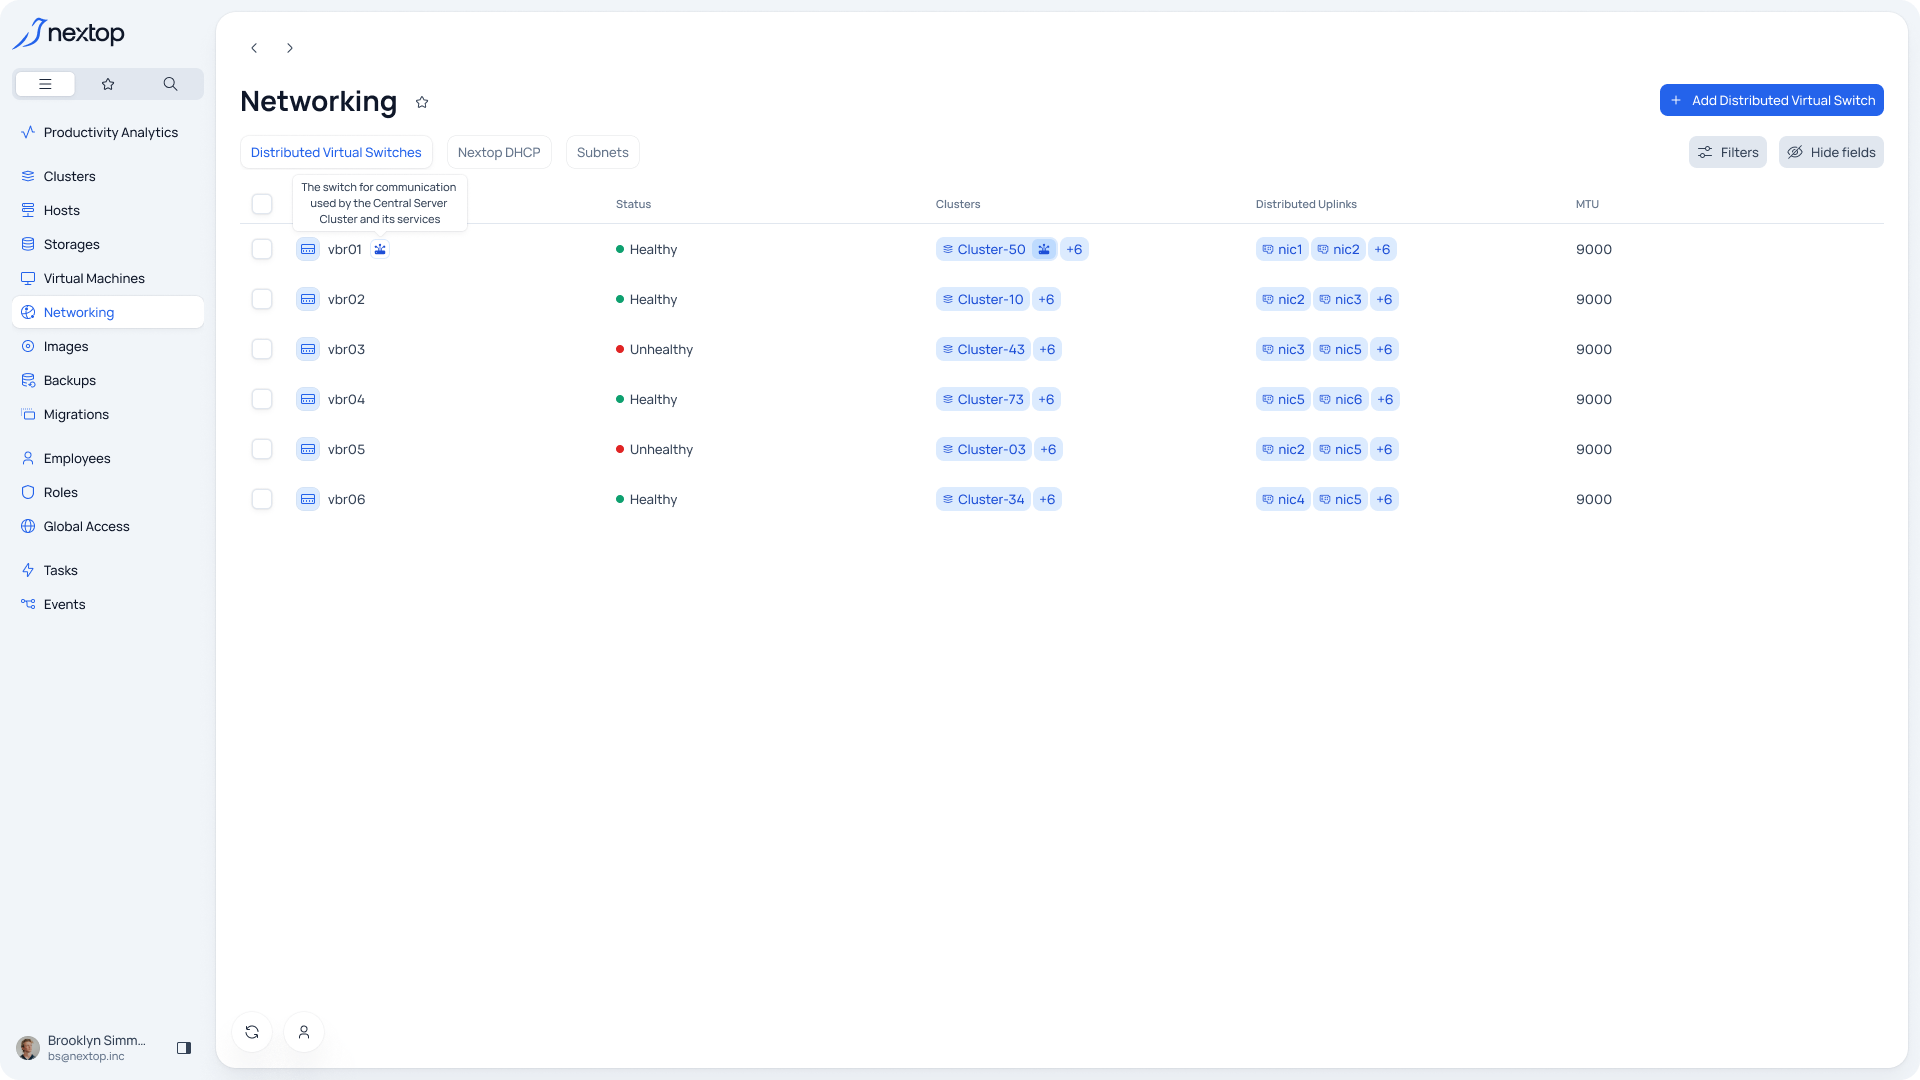
The tab that opens by default when you open “Networking”.
Creating a switch
To add a new virtual switch, you need to select the “add Distributed Virtual Switch” button.
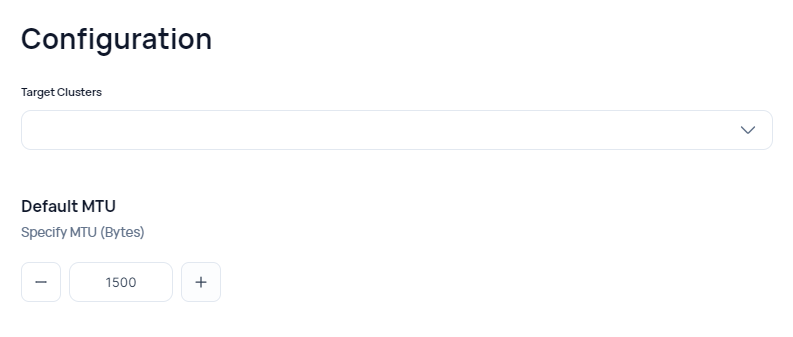
In the opened window, if necessary, you can immediately select the cluster to which the switch will be added, as well as set the MTU parameter value.
To modify the virtual switch, you need to hover over the required item in the table and select the edit icon.
To delete the virtual switch, you need to hover over the required item in the table, expand the additional menu, and select "Delete".
The following items are available for each virtual switch
Summary
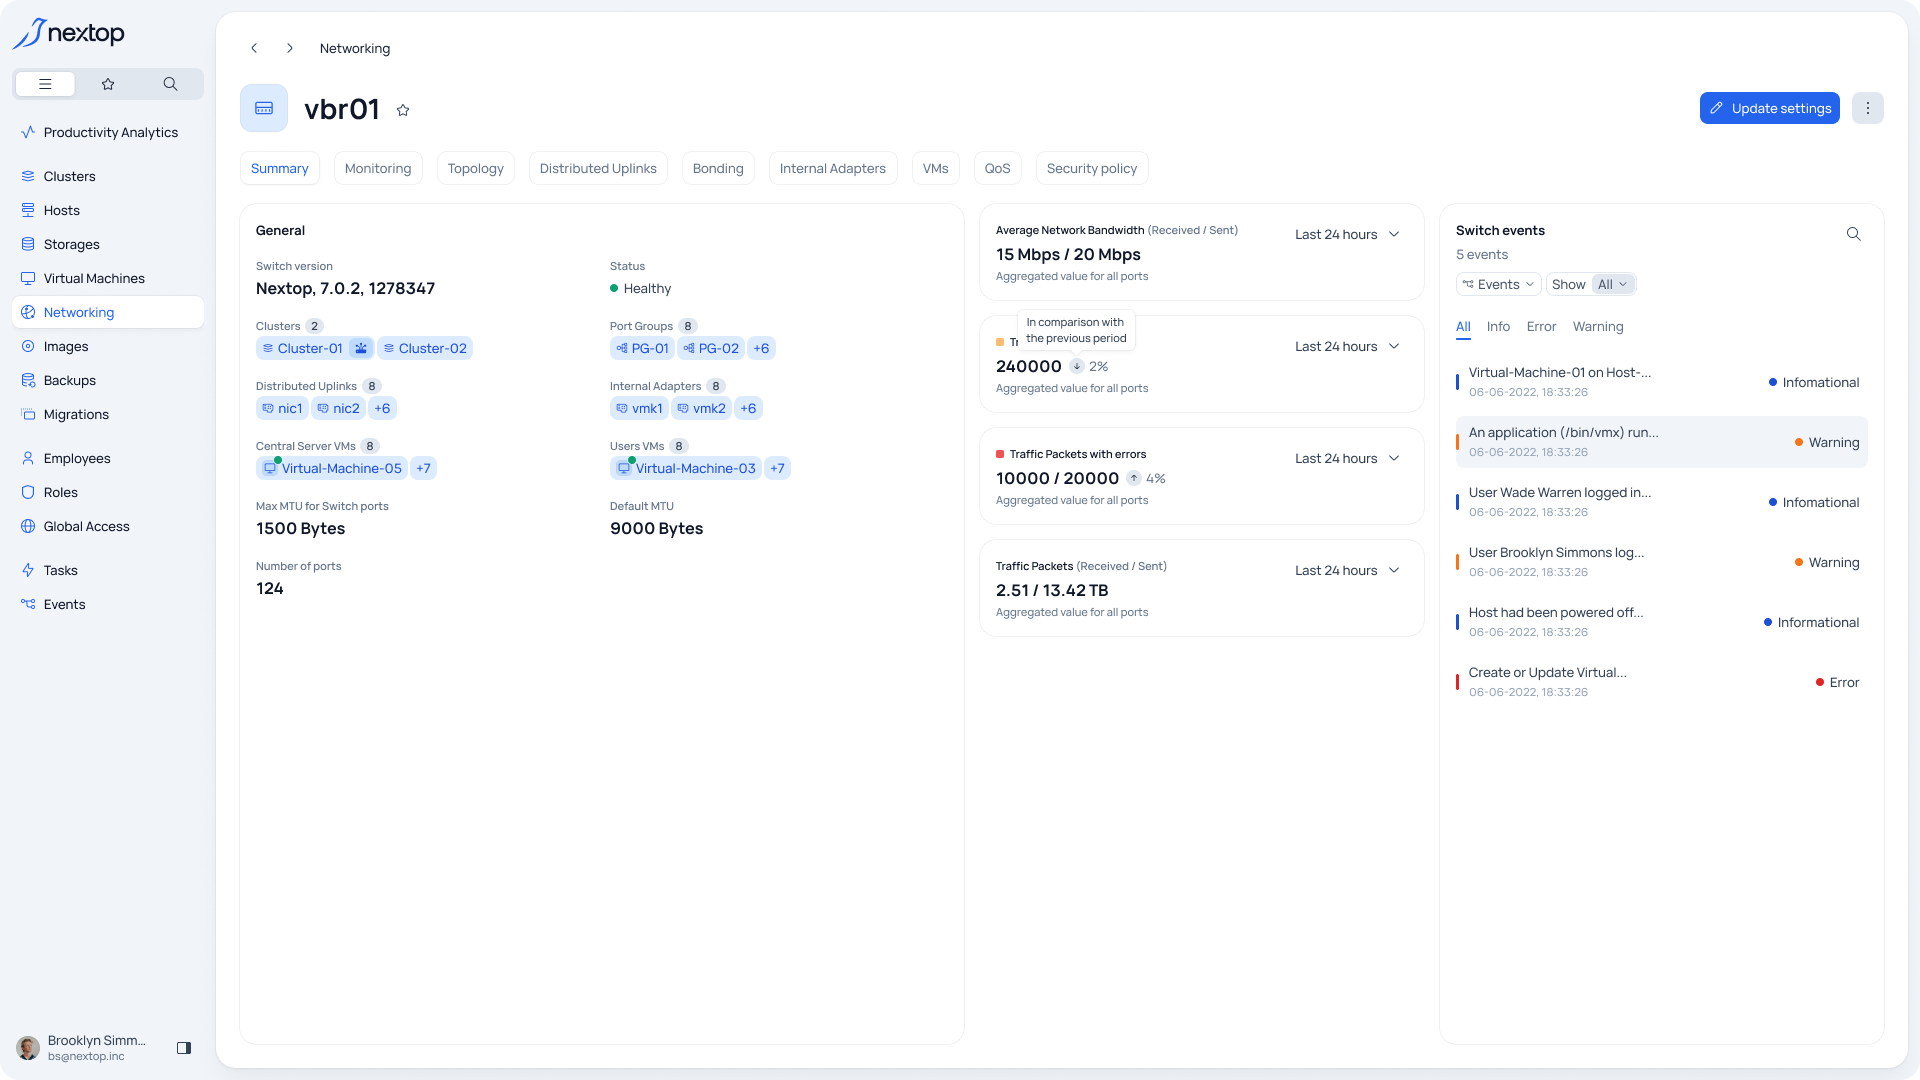
It consists of three main sections:
General - here are listed the main data about the virtual switch and the resources used
The block with the main metrics for the virtual switch
The block with tasks and events, where the virtual switch is indicated as the "Target"
Monitoring
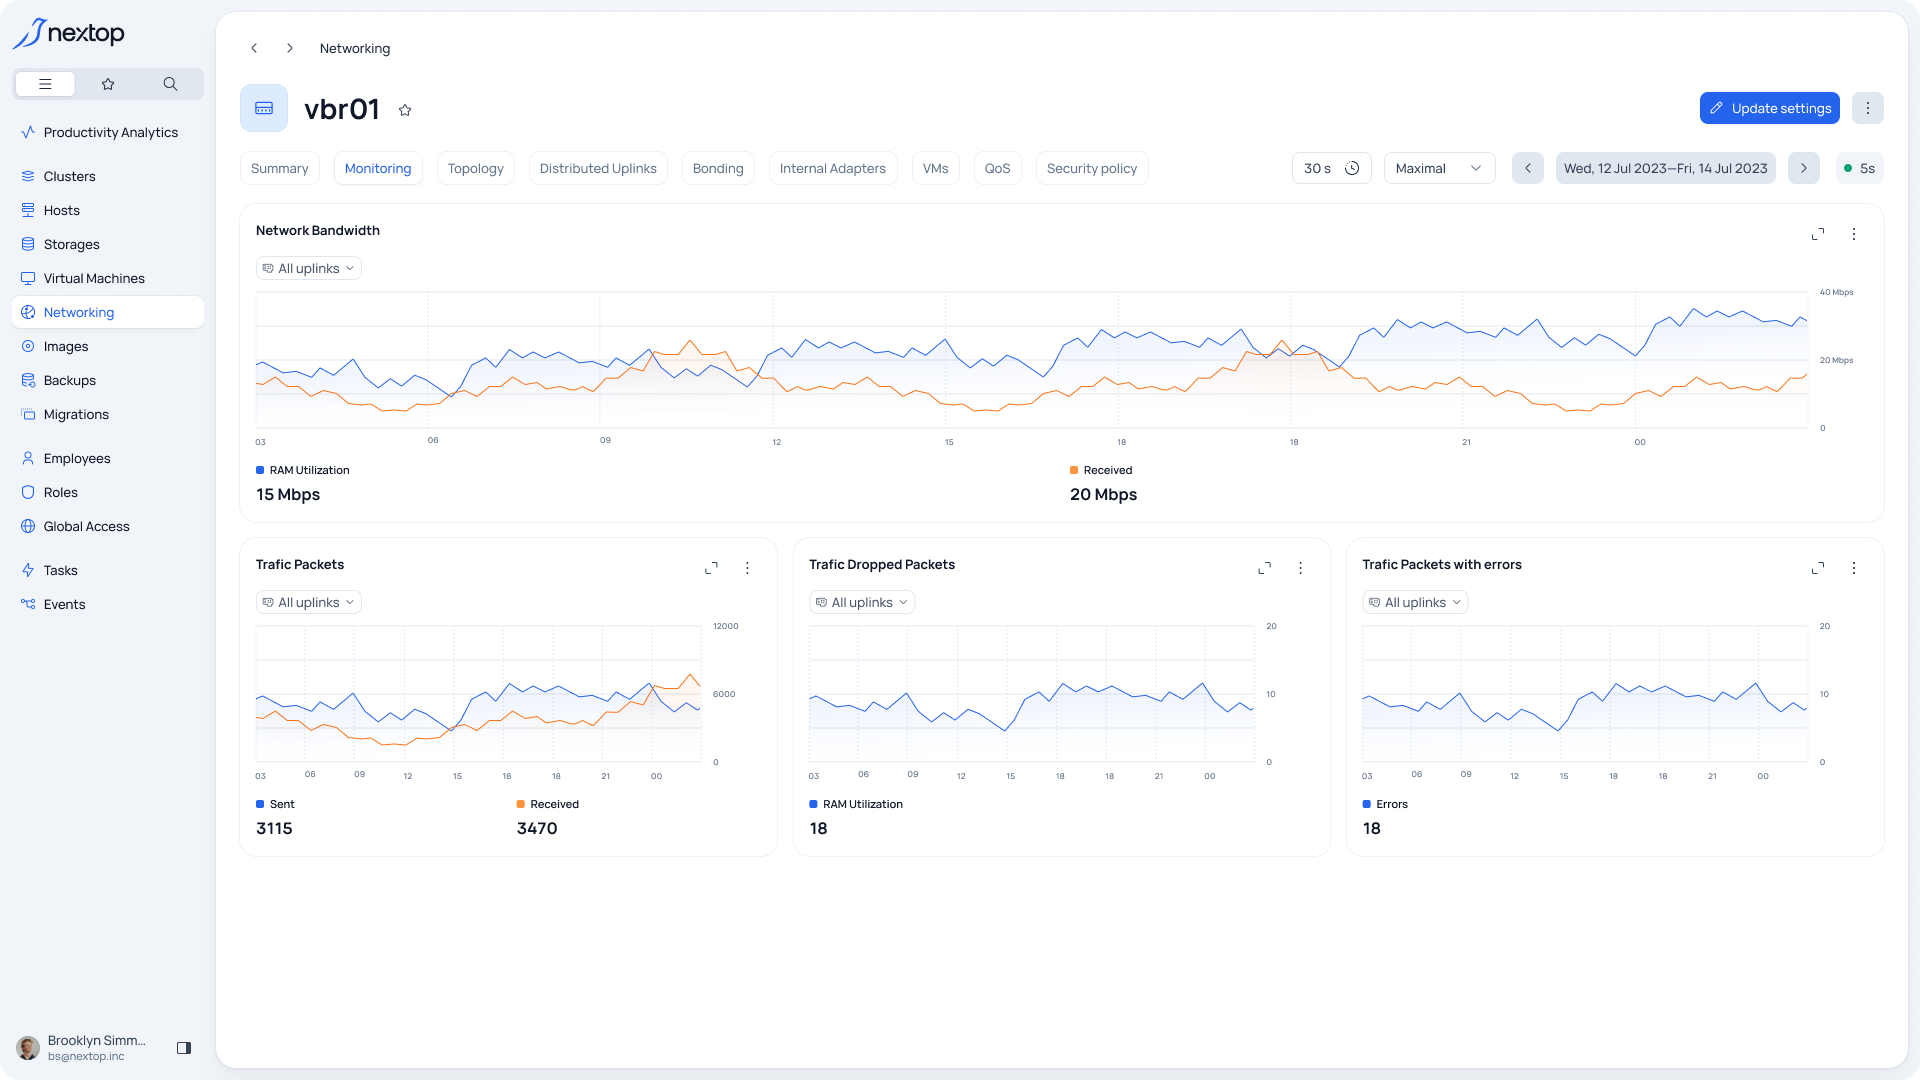
The section with a graphical representation of metrics for the cluster. For more details about monitoring management tools, you can read further in the provided documentation or resource Resources Monitoring Tutorial
Topology
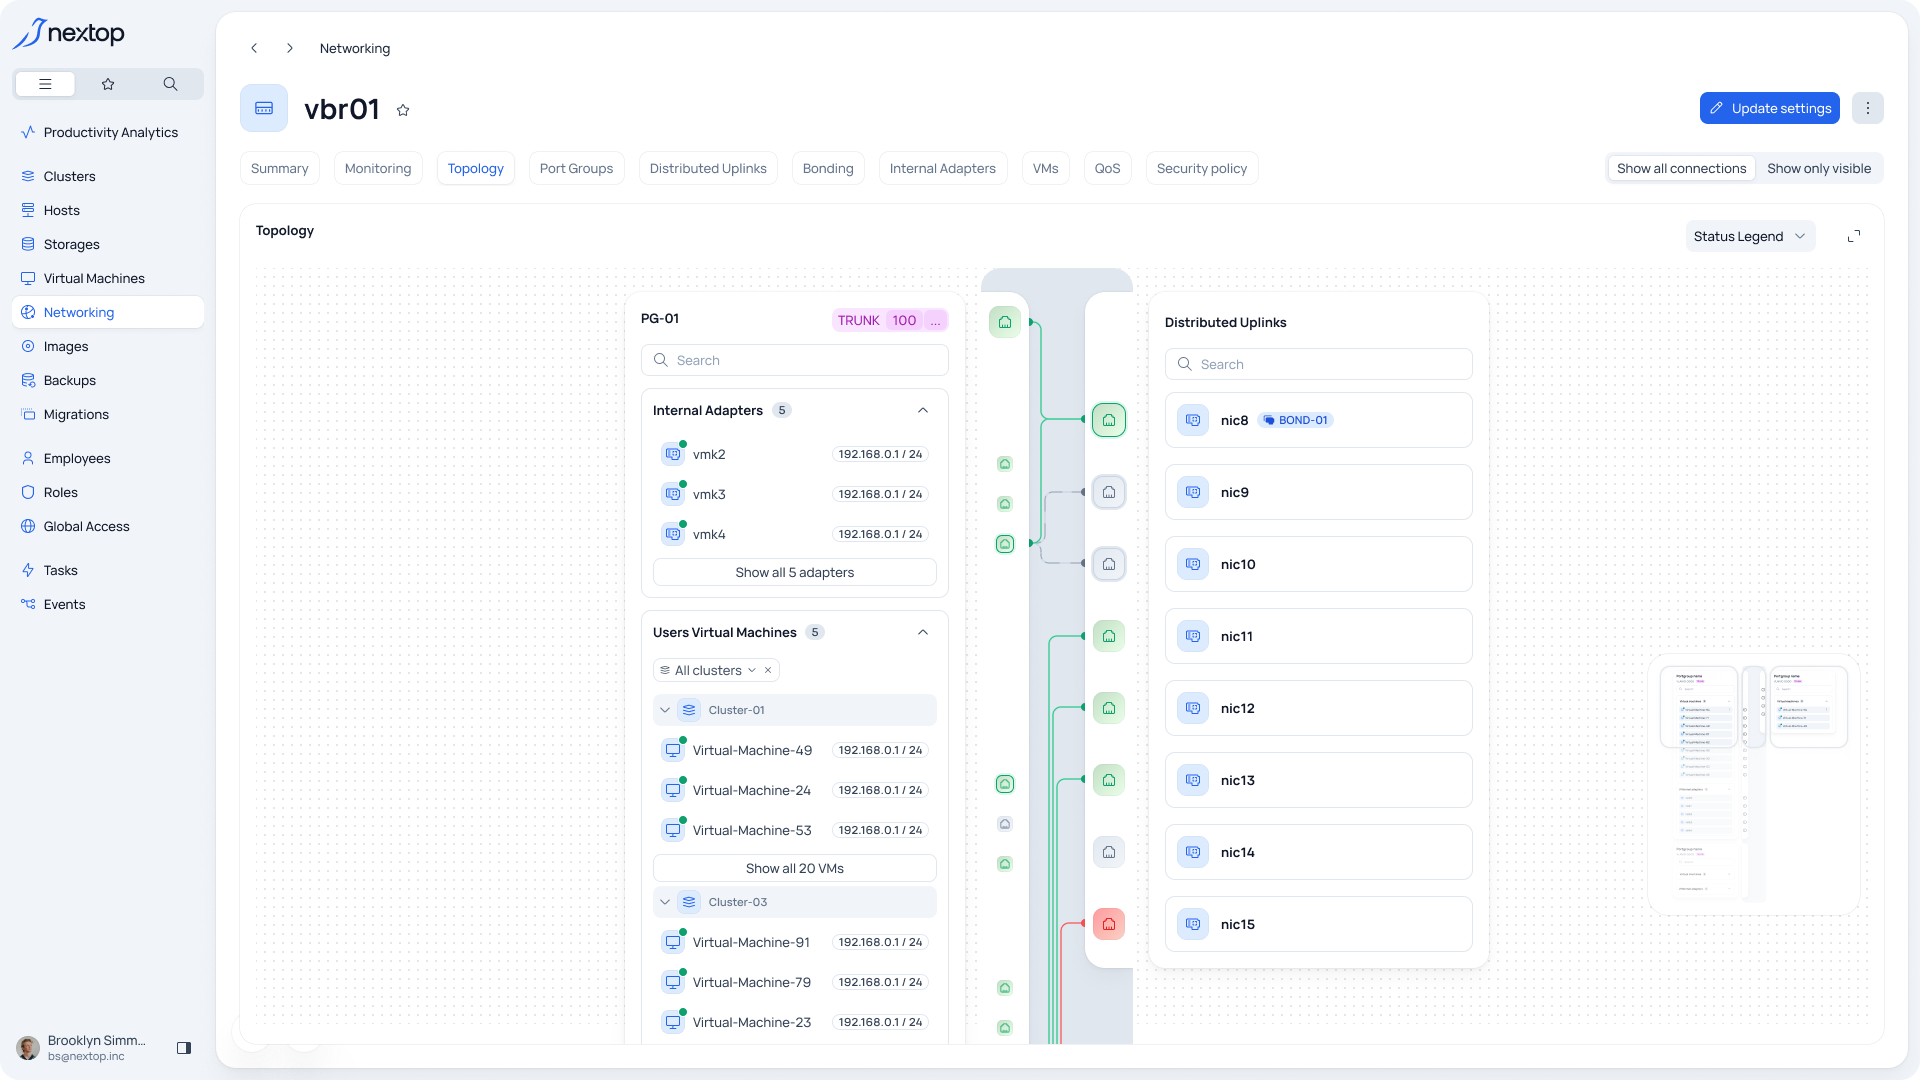
Graphic representation of the topology of the created network.
Port Groups

The table view of all port groups created on the selected virtual switch.
Creating a port group
To add a new port group, you need to select the “add Distributed Port Group” button.
Next steps:
General - here you need to set a name for the port group and a note if necessary
Configuration

VLAN Access/Trunk port. In the case of the latter, also the selection of a range.
Setting the MTU parameter. It is also possible to inherit the switch parameters. In this case, when the parameters are changed, they will change automatically.
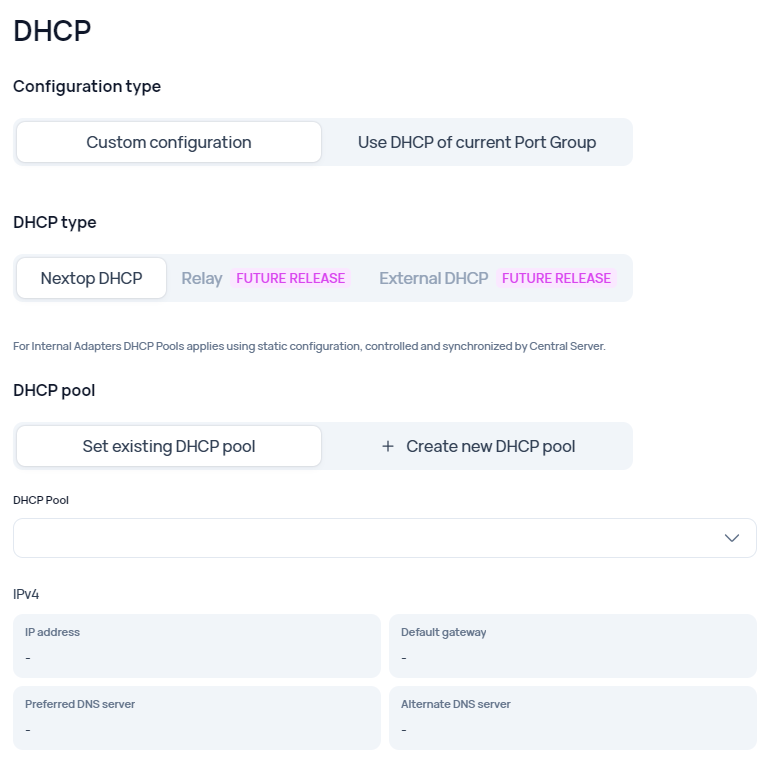
DHCP - The ability to choose DHCP settings. You can select an existing one or create a new one. The steps for creation are described in the corresponding section of the manual. Networking Administration Guide | Adding-a-DHCP-Pool

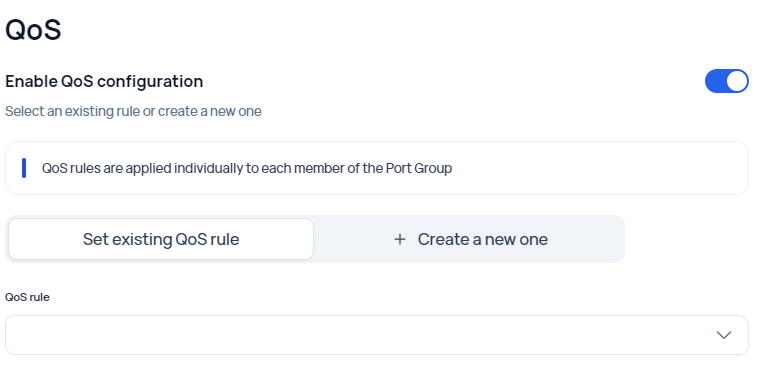
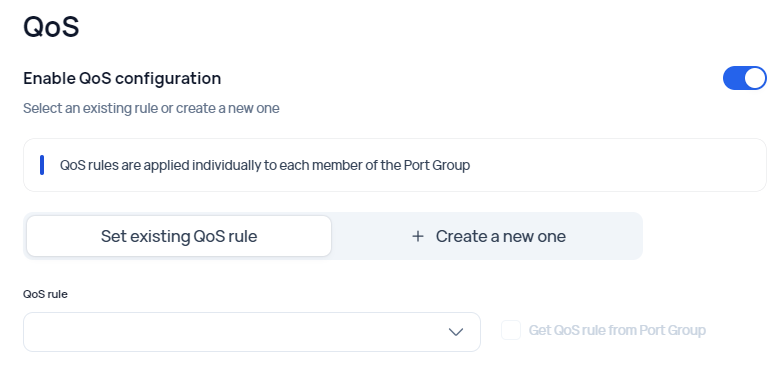
QoS - The ability to choose QoS settings. You can select an existing one or create a new one. The steps for creation are described in the corresponding section of the manual. Networking Administration Guide | Adding-a-QoS-rule
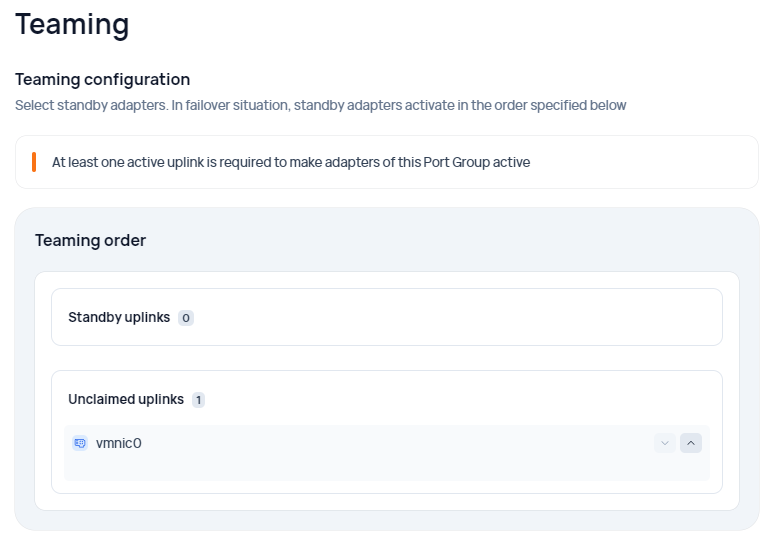
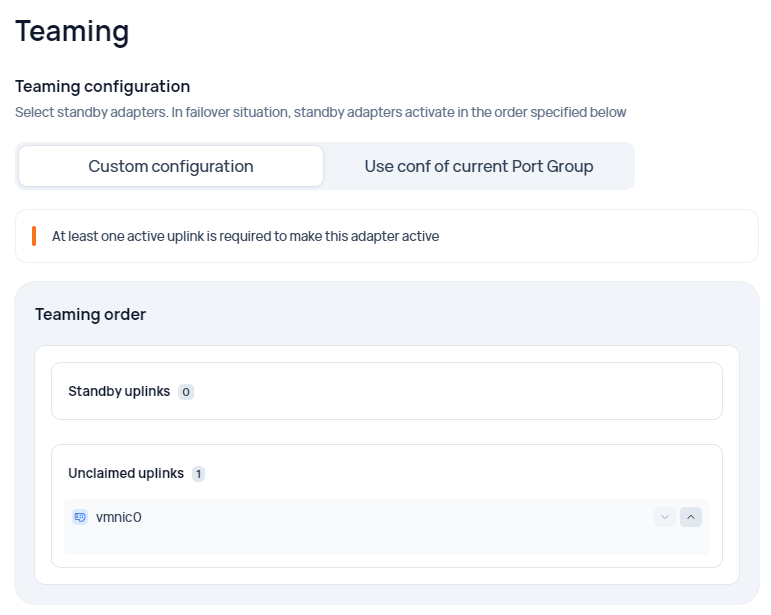
Teaming – setting the operating order of network adapters
Summary – Completing all of the above-listed points is essential for the summary.
Modifying a port group
To modify a port group, you need to hover over the required item in the table and select the edit icon.
Deleting a port group
To delete a port group, you need to hover over the required item in the table, expand the additional menu, and select “Delete”.
Distributed Uplinks
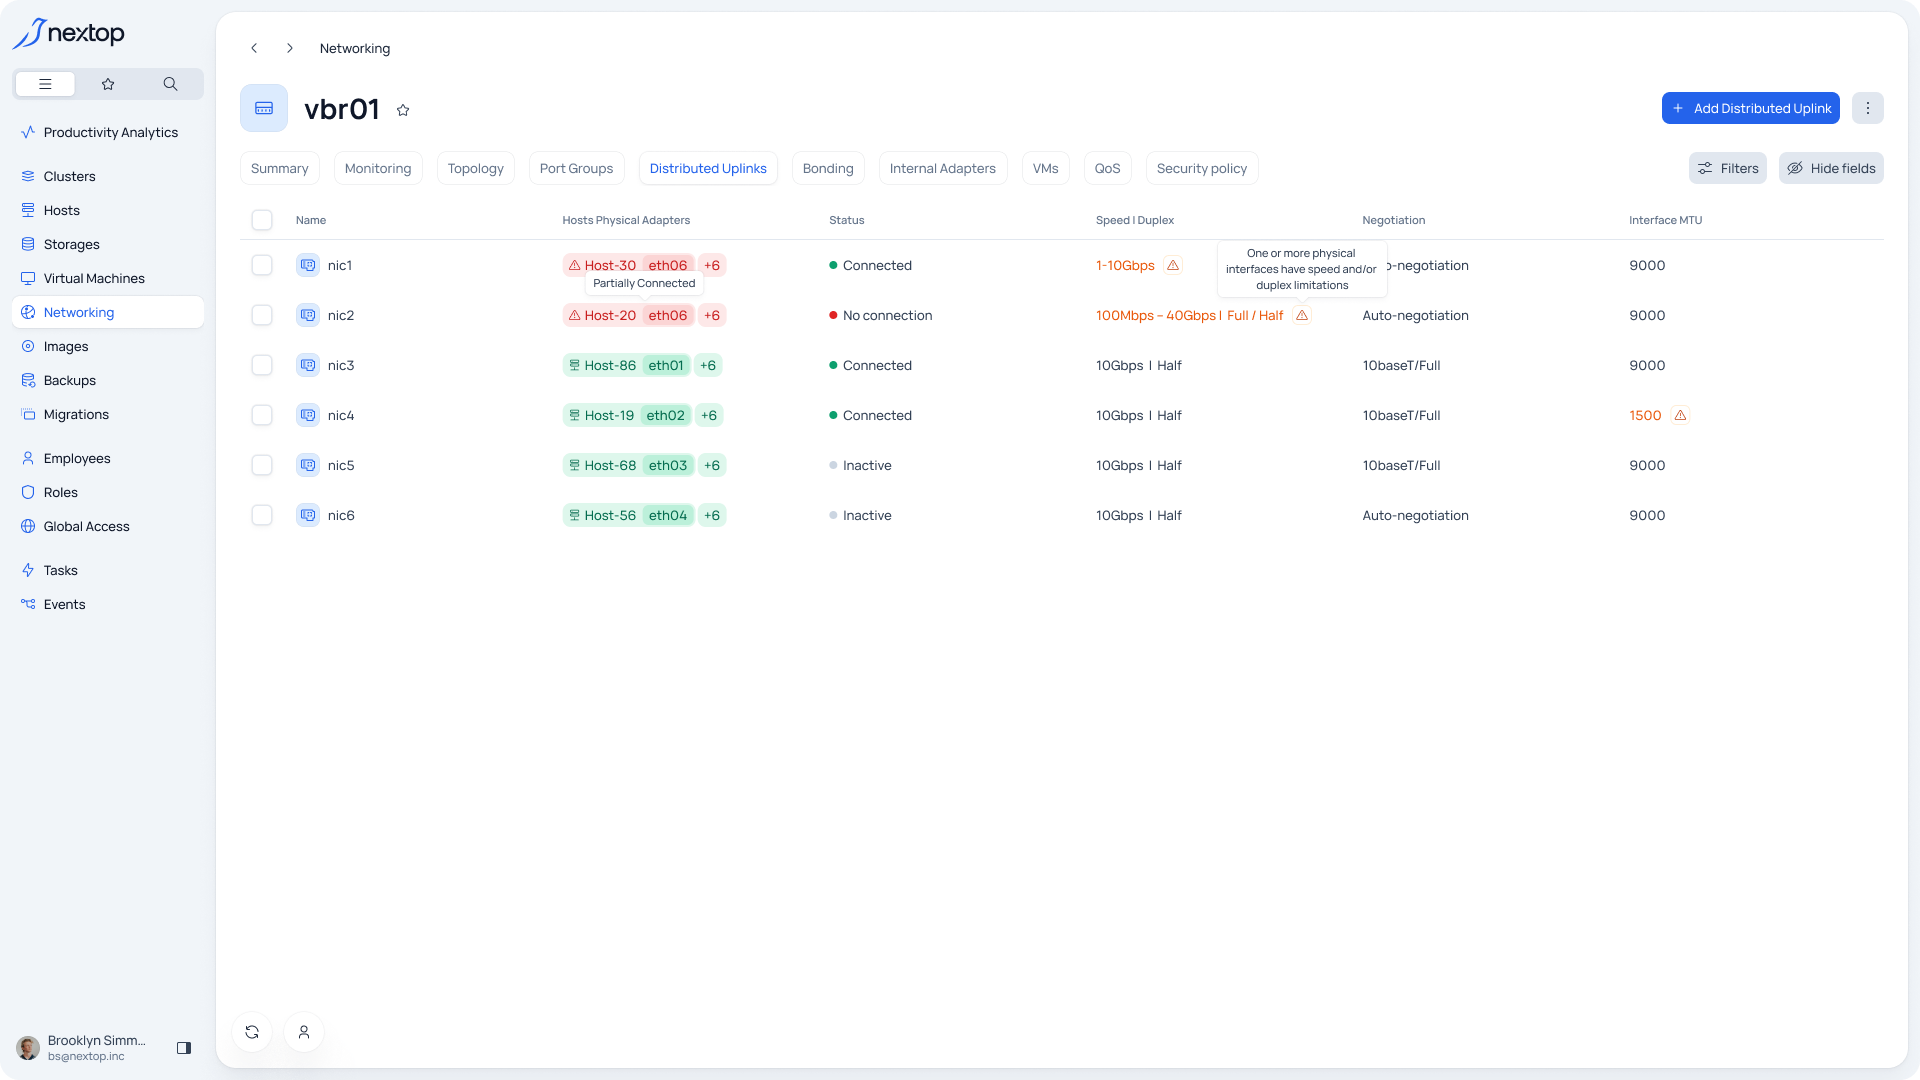
The table representation of all distributed uplinks created on the selected virtual switch.
Creating an uplink
To add a new uplink, you need to select the “add Distributed Uplinks” button.
Next steps:
Configuration
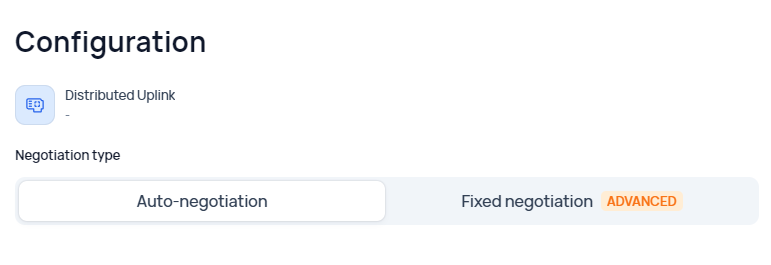
Select the created port group where the uplink needs to be added
Choice of automatic or fixed data transfer rate agreement
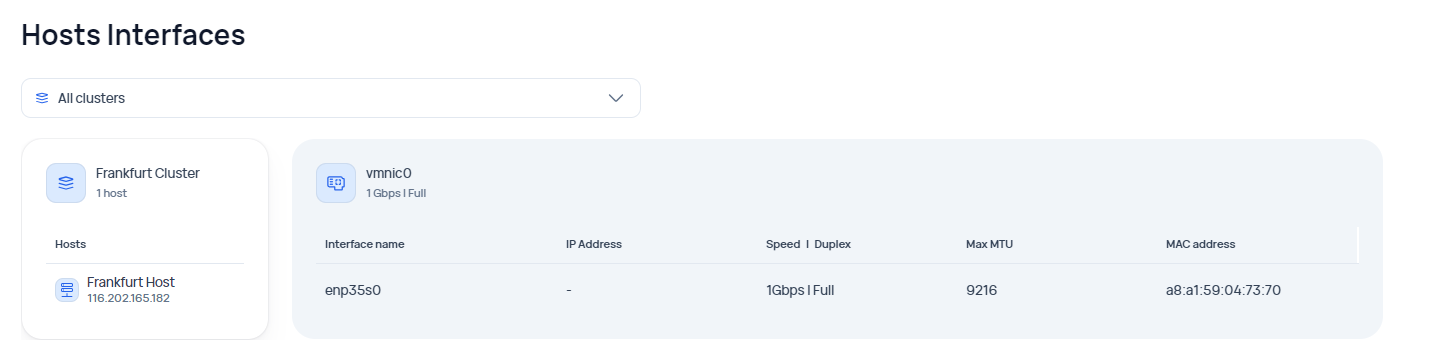
Host interfaces - The ability to choose interfaces within clusters for the server
Modifying a Uplink
To modify a Uplink, you need to hover over the required item in the table and select the edit icon.
Deleting a Uplink
To delete a Uplink, you need to hover over the required item in the table, expand the additional menu, and select “Delete”.
Internal adapters
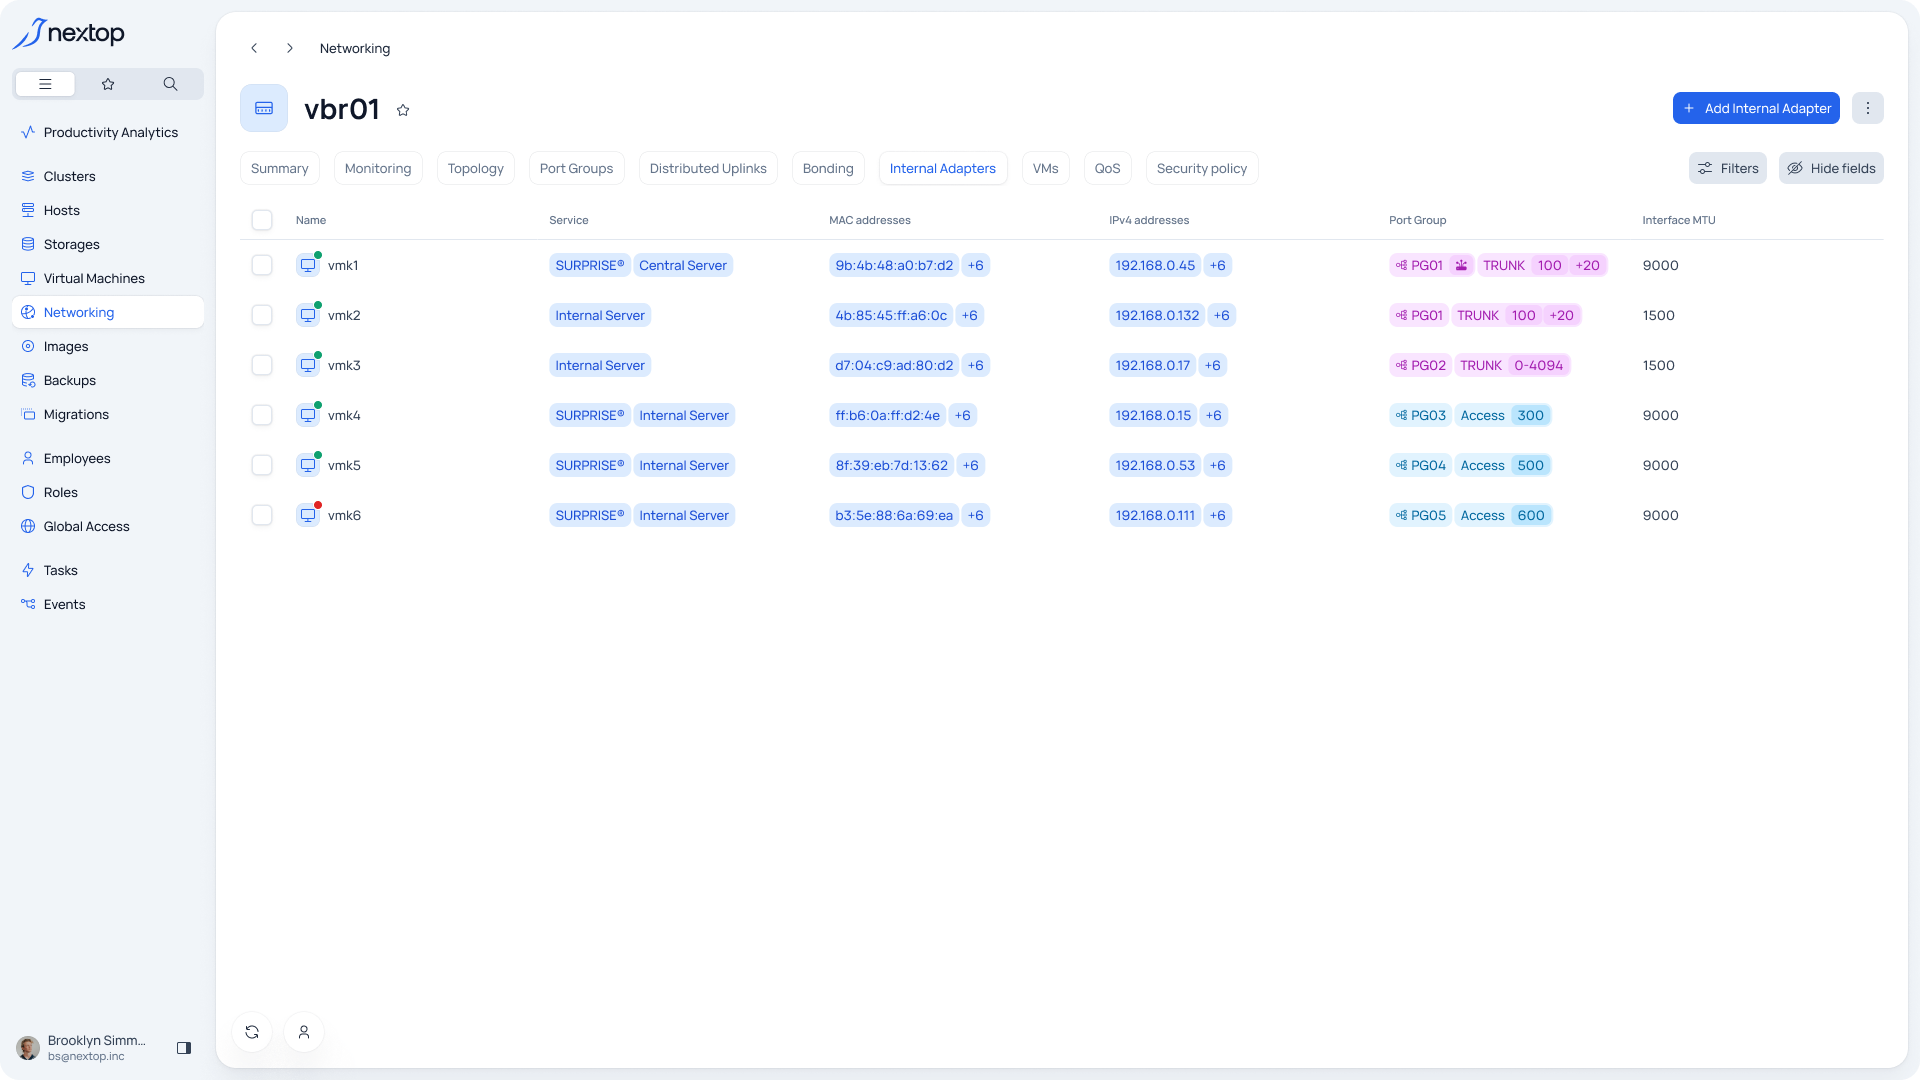
The table representation of all Internal Adapter created on the selected virtual switch.
Creation Internal Adapter
To add a new Internal Adapter, you need to select “add Internal Adapter ”.
Next steps:
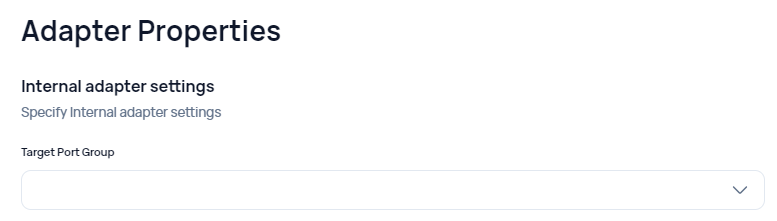
Adapter properties - Выбор созданной порт группы, куда необходимо добавить uplink
IP configuration – The ability to choose DHCP settings. You can select an existing one or create a new one. The steps for creation are described in the corresponding section of the manual. Networking Administration Guide | Adding-a-DHCP-Pool
QoS - The ability to choose QoS settings. You can select an existing one or create a new one. The steps for creation are described in the corresponding section of the manual. Networking Administration Guide | Adding-a-QoS-rule
Teaming – setting the operating order of network adapters
Summary – Completing all of the above-listed points is essential for the summary.
Modifying a Internal Adapter
To modify a Internal Adapter, you need to hover over the required item in the table and select the edit icon.
Deleting a Internal Adapter
To delete a Internal Adapter, you need to hover over the required item in the table, expand the additional menu, and select “Delete”.
VMs
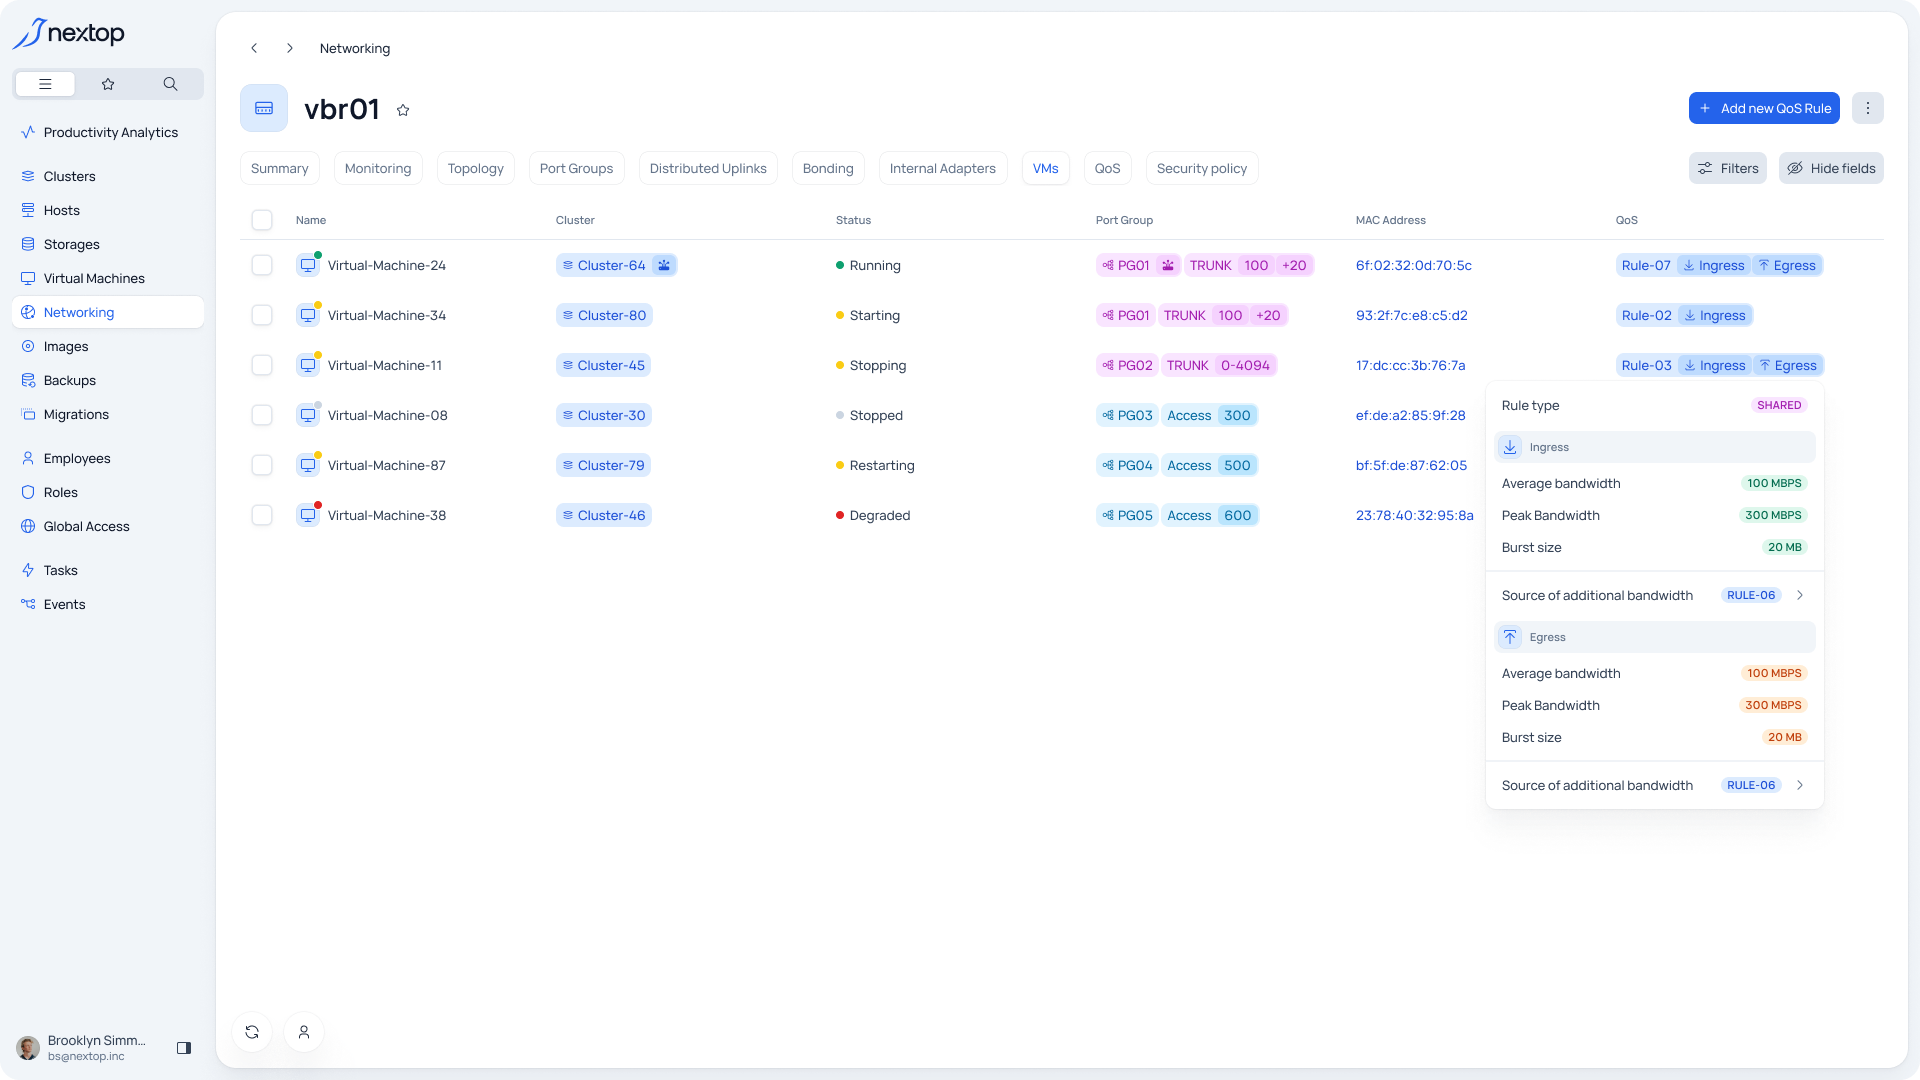
The table representation of all virtual machines created on the virtual switch. For more details, you can refer to the documentation on the provided link. Virtual Machines Administration Guide
To modify a virtual machine, you need to hover over the required item in the table and select the edit icon.
To delete a virtual machine, you need to hover over the required item in the table, expand the additional menu, and select "Delete".
QoS
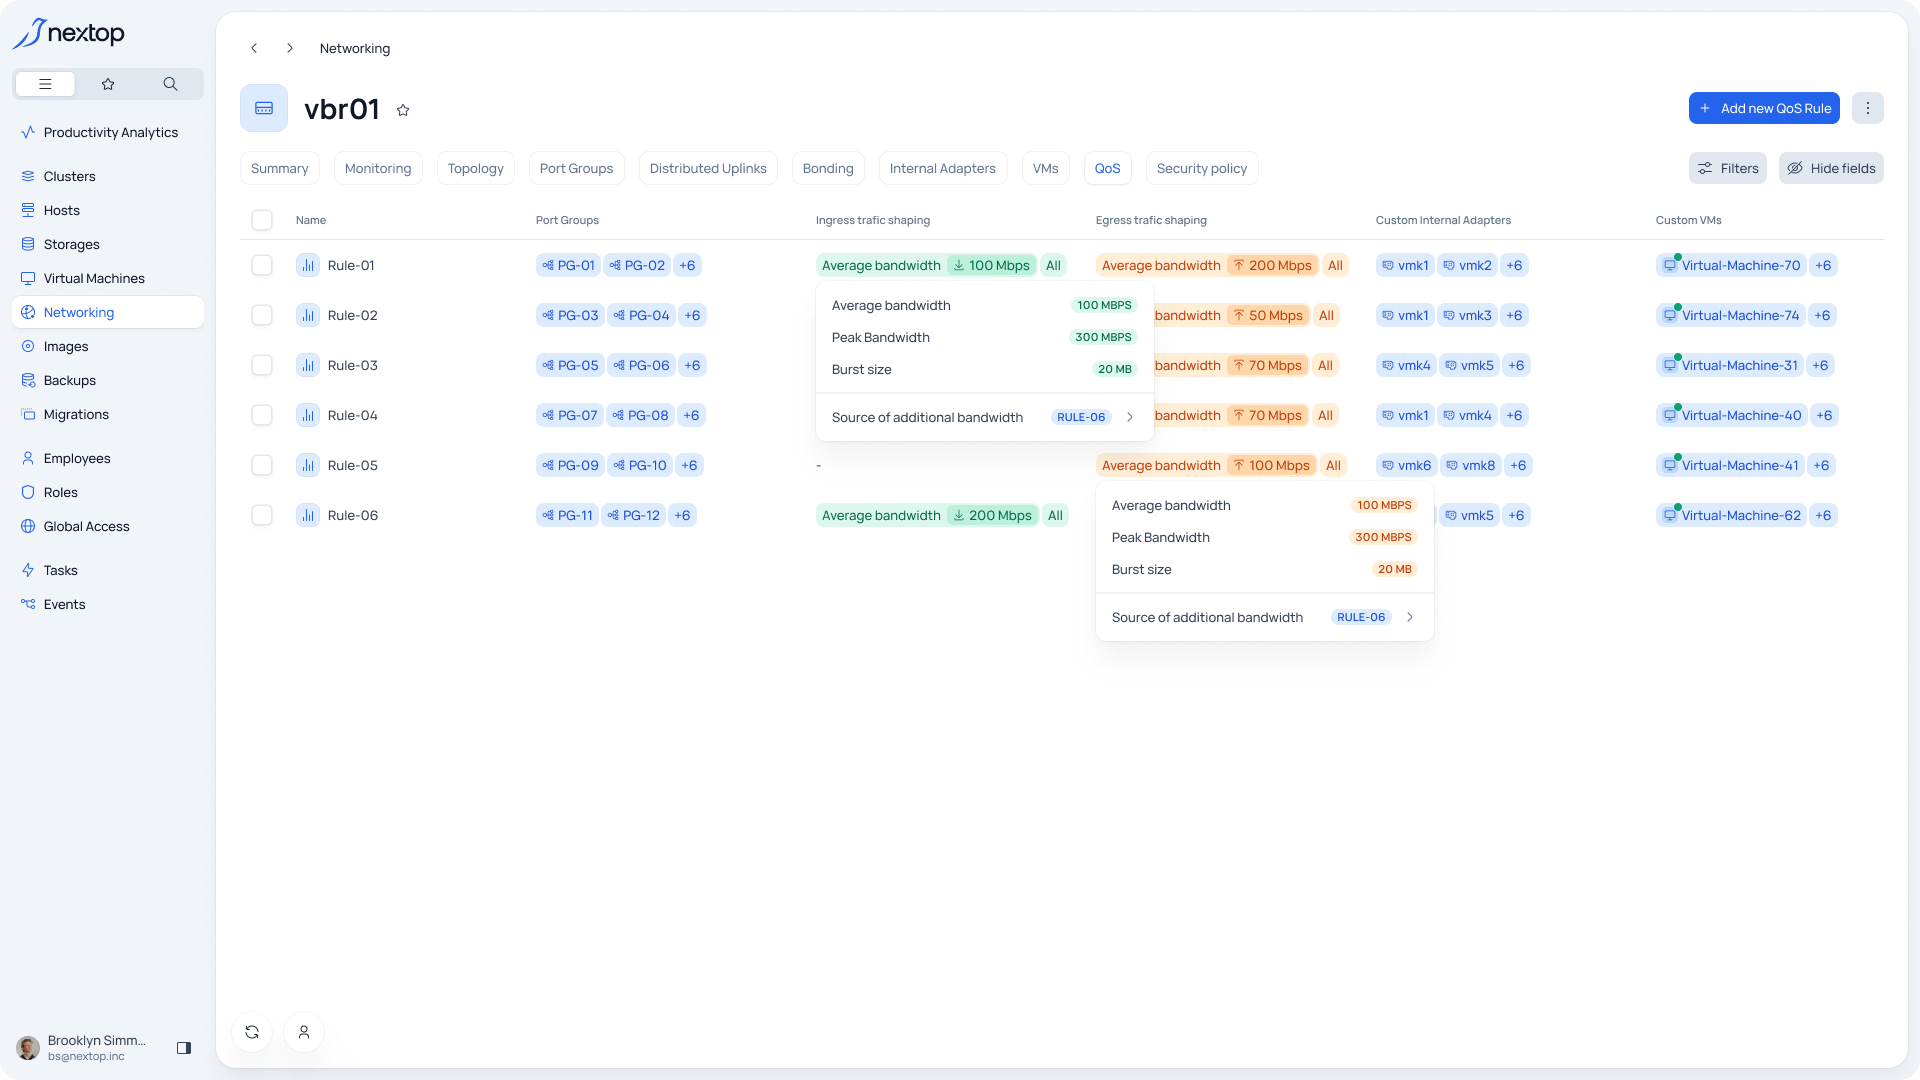
The table representation of all QoS rules created on the selected virtual switch.
Adding a QoS rule
To add a new rule, you need to select the “add QoS rule” button.
Next steps:
General – here you need to set a name for the rule and a note if necessary.
Configuration
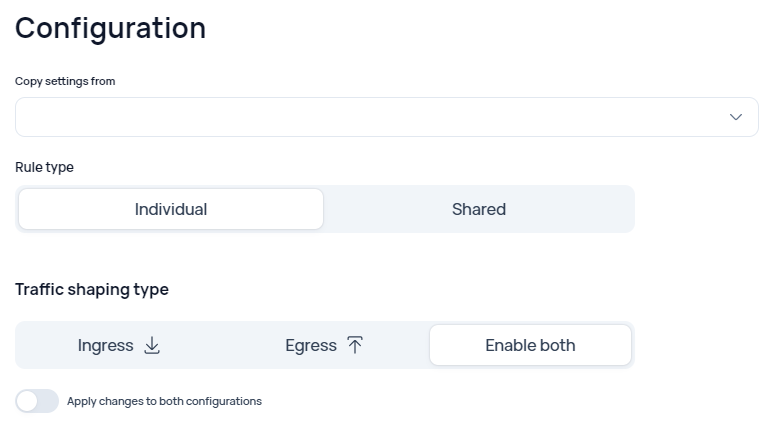
Copy setting - The ability to copy the parameters set from a previously created rule.
Rule type – the type of rule.
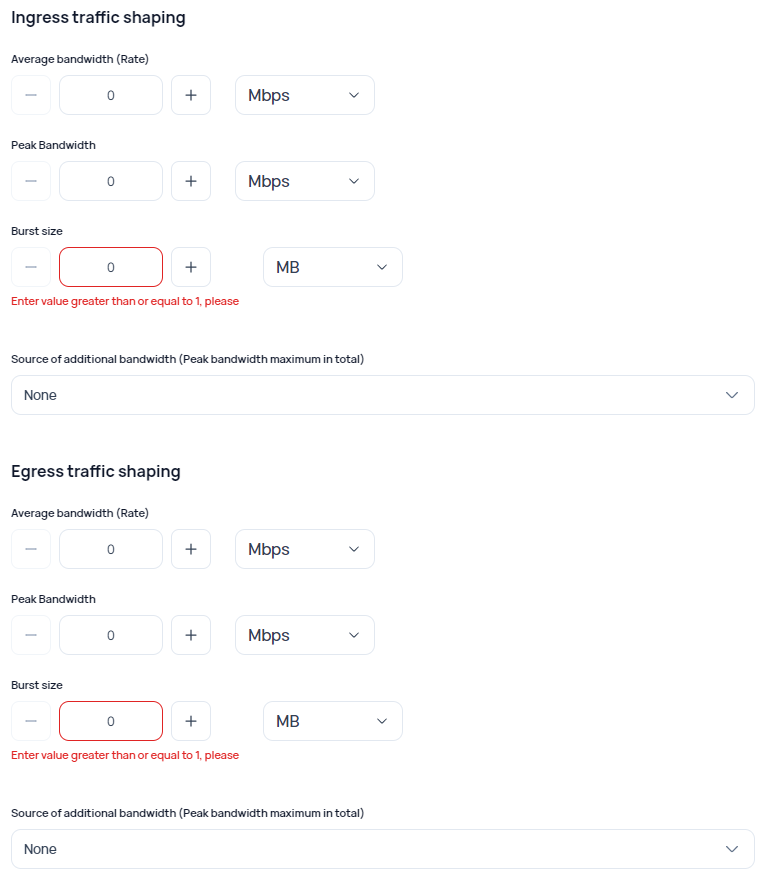
Traffic shaping type - limiting the bandwidth of a channel for an individual network node below the technical capabilities of the channel to the node. It can be configured separately for incoming and outgoing traffic, as well as for both directions simultaneously.
Modifying a QoS
To modify a QoS, you need to hover over the required item in the table and select the edit icon.
Deleting a QoS
To delete a QoS, you need to hover over the required item in the table, expand the additional menu, and select “Delete”.
Security policy
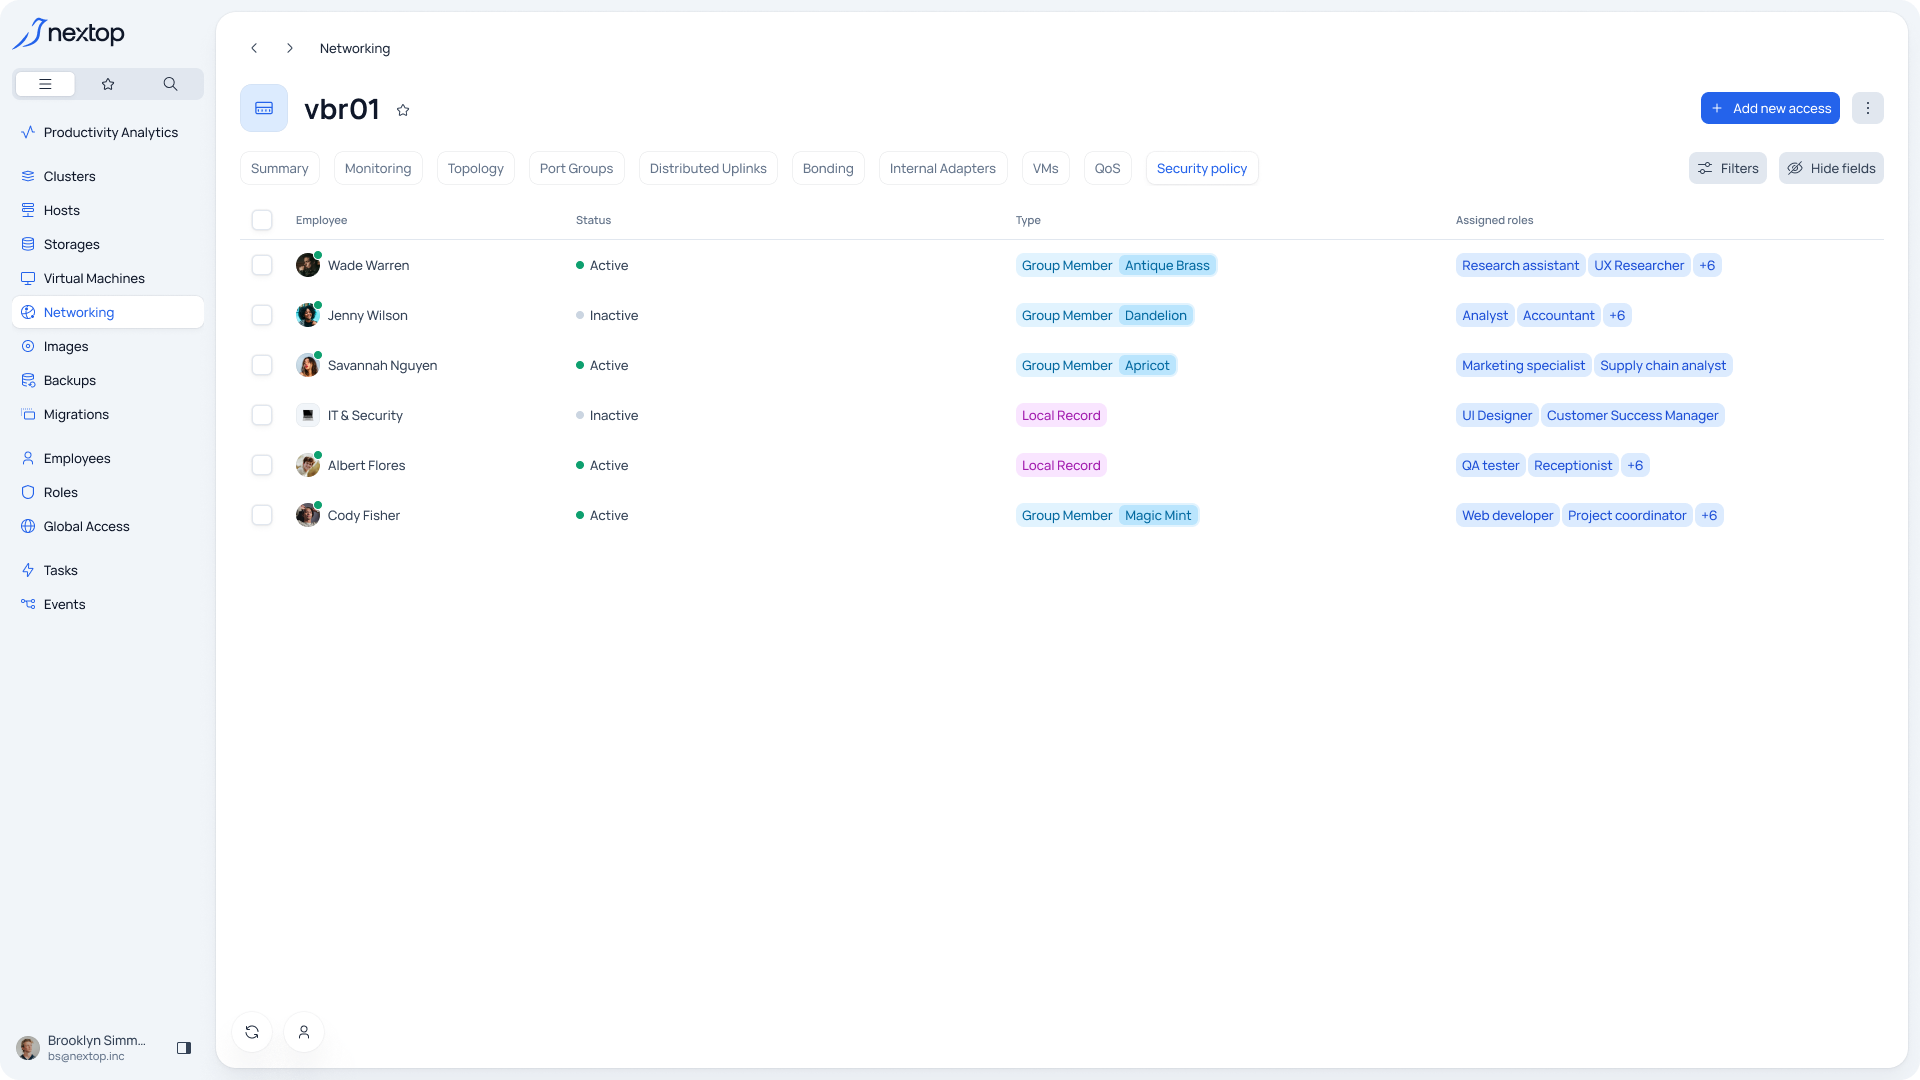
A table view listing the roles and the users to whom these roles have been assigned.
To add a new user, you need to select the "Provide access" button. Then choose the user/group and set of rights. You can read more at the provided documentation link. Global access to system resources
To change rights, hover over the required element in the table and select the edit icon.
To delete rights, hover over the required element in the table, expand the additional menu, and select "Delete".
DHCP pools
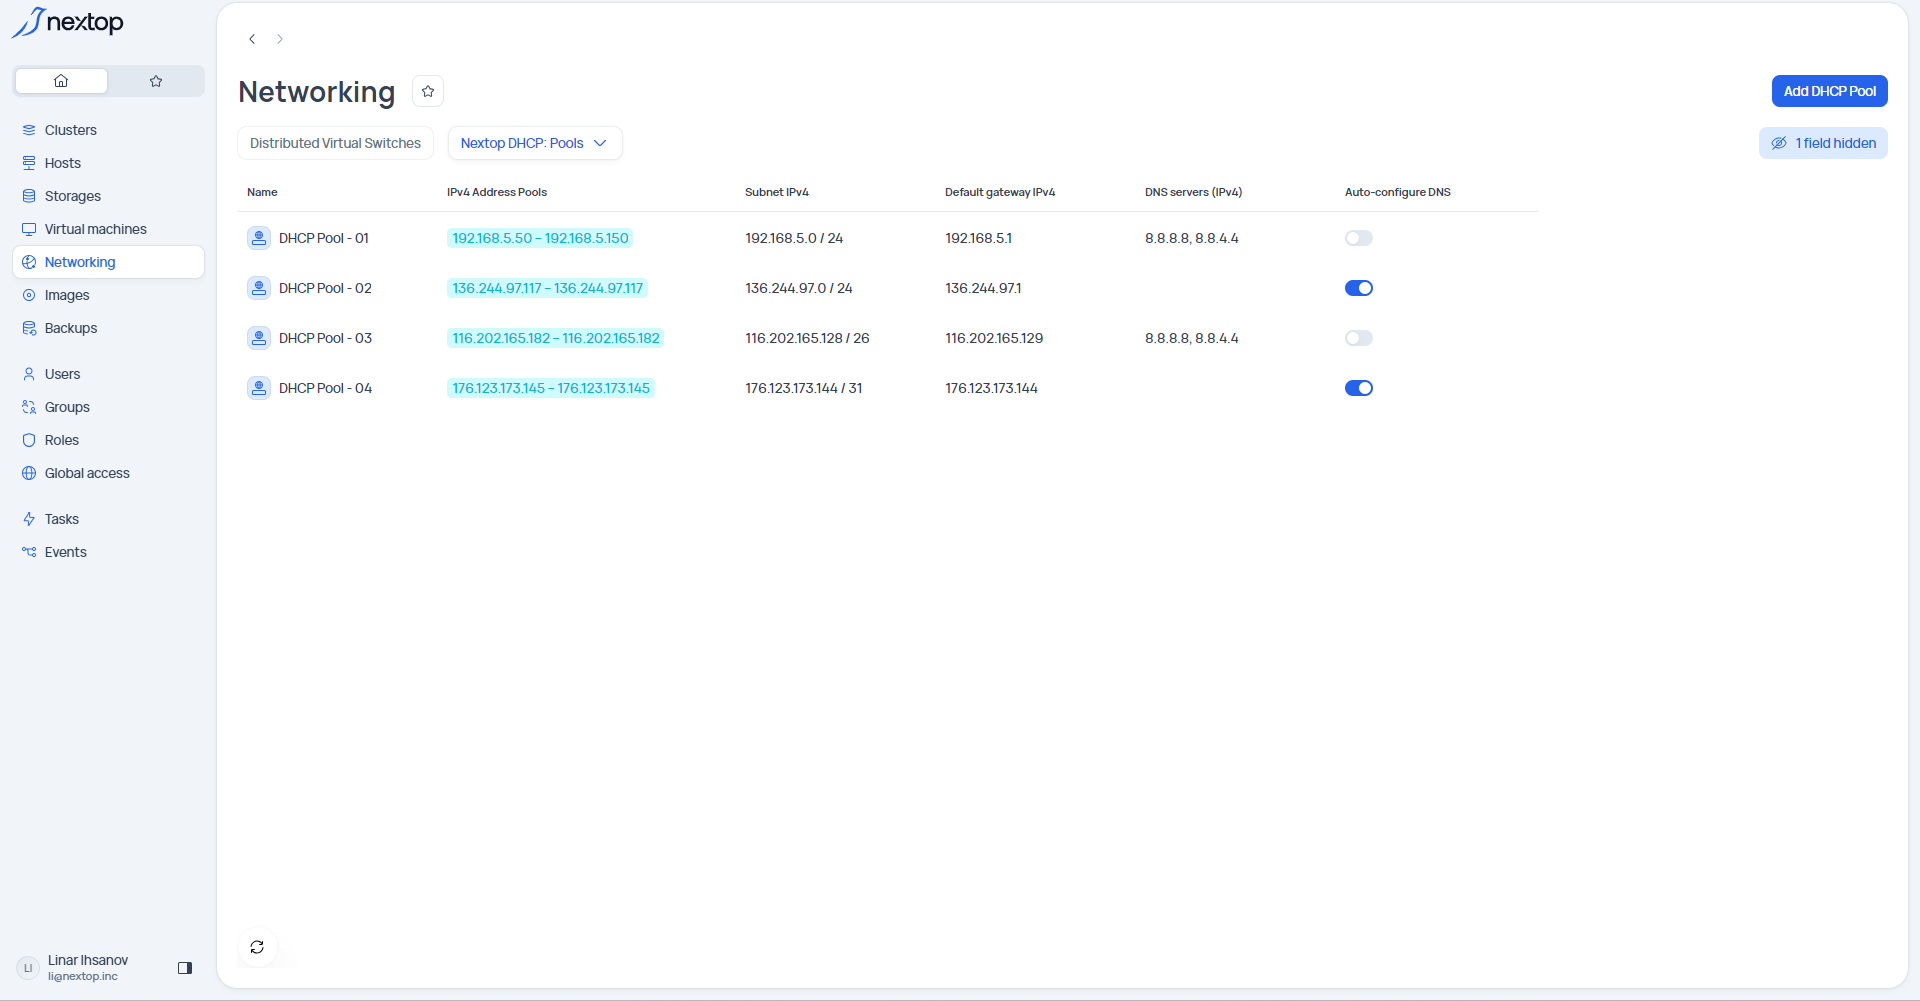
To navigate, you need to go to the “Networking” section and select the “Nextop DHCP” tab, which lists all the DHCP pools created in the system in a table format.
Adding a DHCP Pool
To add a new virtual switch, you need to select the “add DHCP pool” button. Next steps:
General - here you need to set a name for the pool and a note if necessary.
Configuration - here you need to fill in the following items according to the system’s needs:
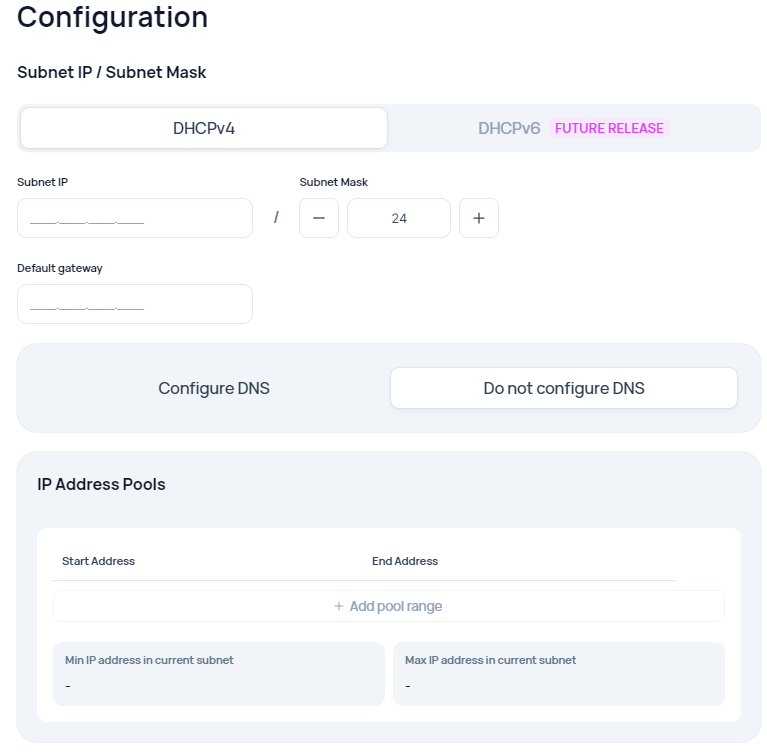
DHCP type - choose either DHCP version 4 or 6.
Subnet IP / Subnet mask - the subnet address and mask.
Default gateway - the default gateway.
DNS server addresses - the DNS settings block.
IP address Pools - setting the ranges of IP addresses.
Modifying a DHCP Pool
To modify a DHCP Pool, you need to hover over the required item in the table and select the edit icon.
Deleting a DHCP Pool
To delete a DHCP Pool, you need to hover over the required item in the table, expand the additional menu, and select “Delete”.